As an Amazon Associate I earn from qualifying purchases.
You can read my full disclosure statement here.

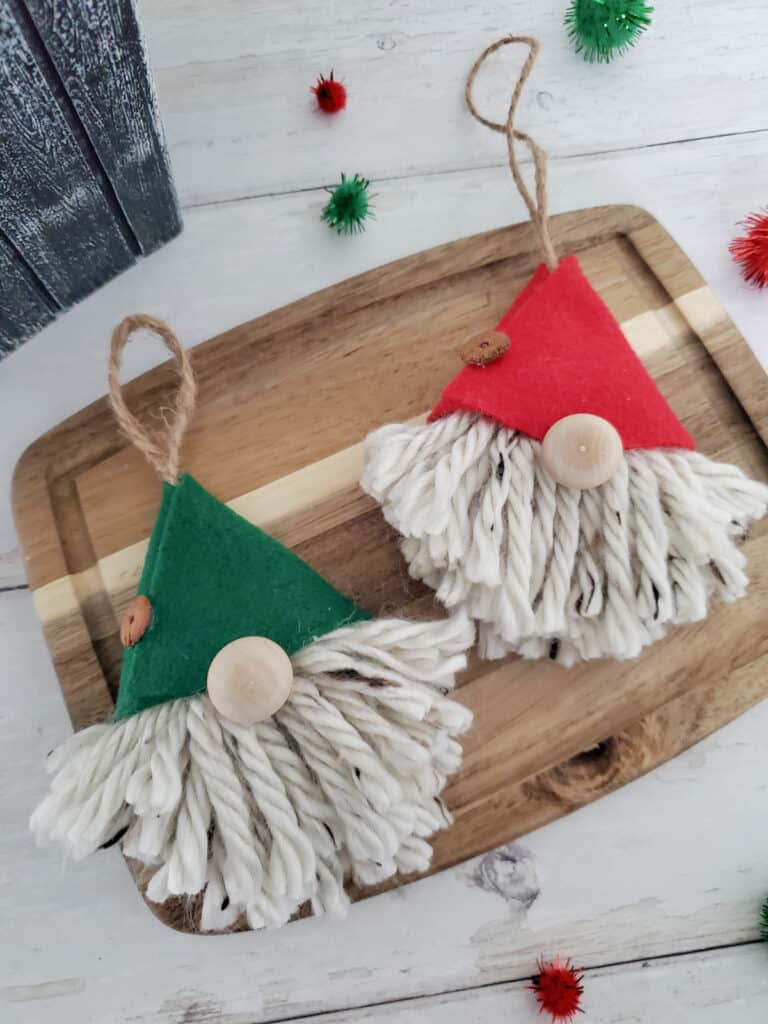
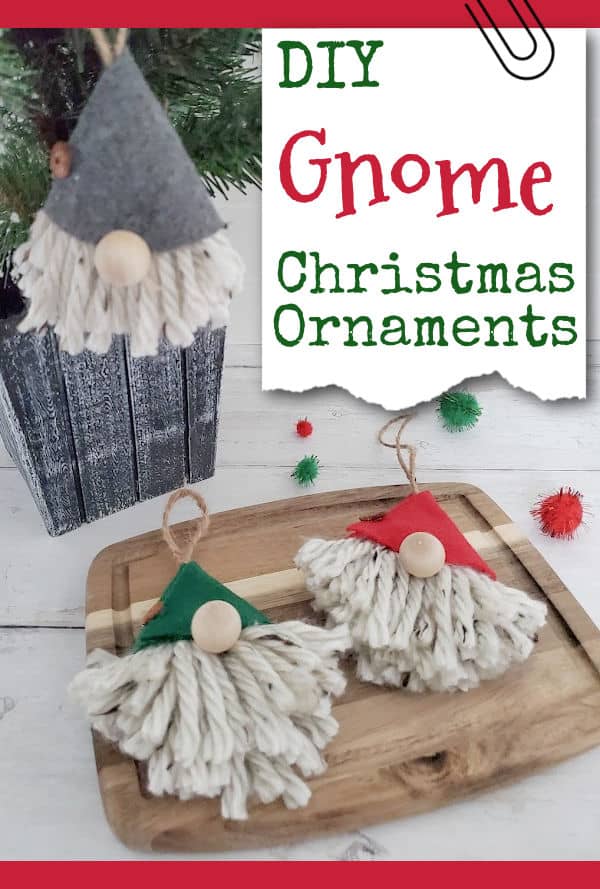
These adorable DIY Gnome Christmas Ornaments are simple to make in just 5 minutes! Perfect ornament craft for kids and adults alike to add to your Christmas decor!
This Christmas season, have a go at making these adorable gnome Christmas ornaments! This fun Christmas craft is a great idea to do with friends and family!
mThese little DIY Christmas gnomes will bring holiday cheer as well as a bit of Scandinavian folklore to your holiday decorations! Jump on the gnome trend that has become so popular in recent years!
Make some for yourself, but also to give as gifts! Hang one on a bottle of wine or sparkling cider to make the perfect hostess gift this holiday season! Or pair with these cute Hot Cocoa in a Jar Gifts!
Scroll down below to get the step by step tutorial on how to make this adorable gnome ornament with a yarn beard and wooden bead nose!
Make these delicious Christmas Tree Rice Krispie Treats or Hot Cocoa Cake Mix Cookies to serve while making these fun gnomes!
If you like making your own DIY Christmas Ornaments, you might also be interested in my Snowman Wood Bead Ornament tutorial! Also see my full list of over 50+ Handmade Gift Ideas to get other holiday gift giving ideas!
100+ Ideas for Bored Kids
Outdoor Christmas Gnomes Tutorial
DIY Peppermint Sugar Scrub
Our favorite Homesteading & Gardening things in our Amazon Store!
Our Garden Harvest Tally Spreadsheet is now available!
SUPPLIES NEEDED FOR THE DIY Gnome Christmas Tree Ornament:
This tutorial makes one Gnome Christmas Ornament. You might want to plan to make a couple at a time so that you can keep one for your self, and gift the others for a teacher, friend or loved one!
Clear a place to work and gather your craft supplies, good luck and have fun making these cute Christmas gnomes!
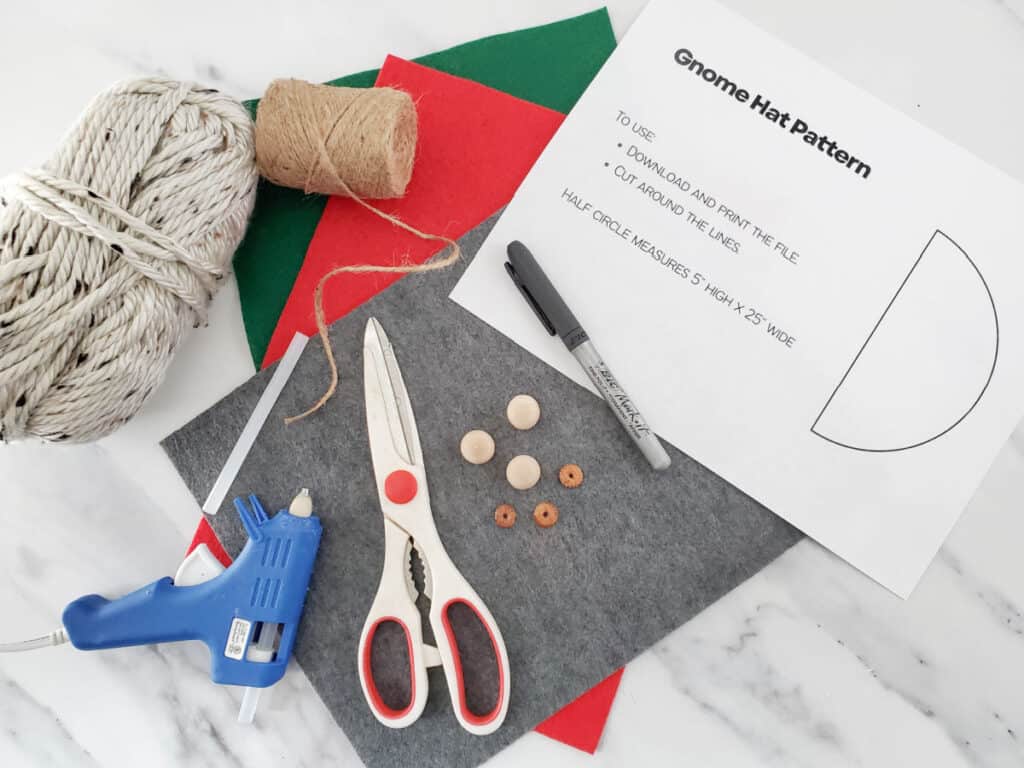
Supplies List:
- Gnome hat pattern (download and print, or make your own half circle 5" long x 2.5" high)
- Black Marker
- Scissors
- Felt sheet
- 3 yards of yarn - super bulky weight yarn is used for this project
- 1 piece of twine 12" long
- Hot glue gun loaded with glue sticks
- ¾ inch wooden doll head (flat on one side)
- Flat bead or button, about ½ inch in diameter
HOW TO MAKE A DIY Gnome Christmas Tree Ornament:
Directions: Step 1:
- Download and print the gnome hat pattern, see red button above under the supplies list.
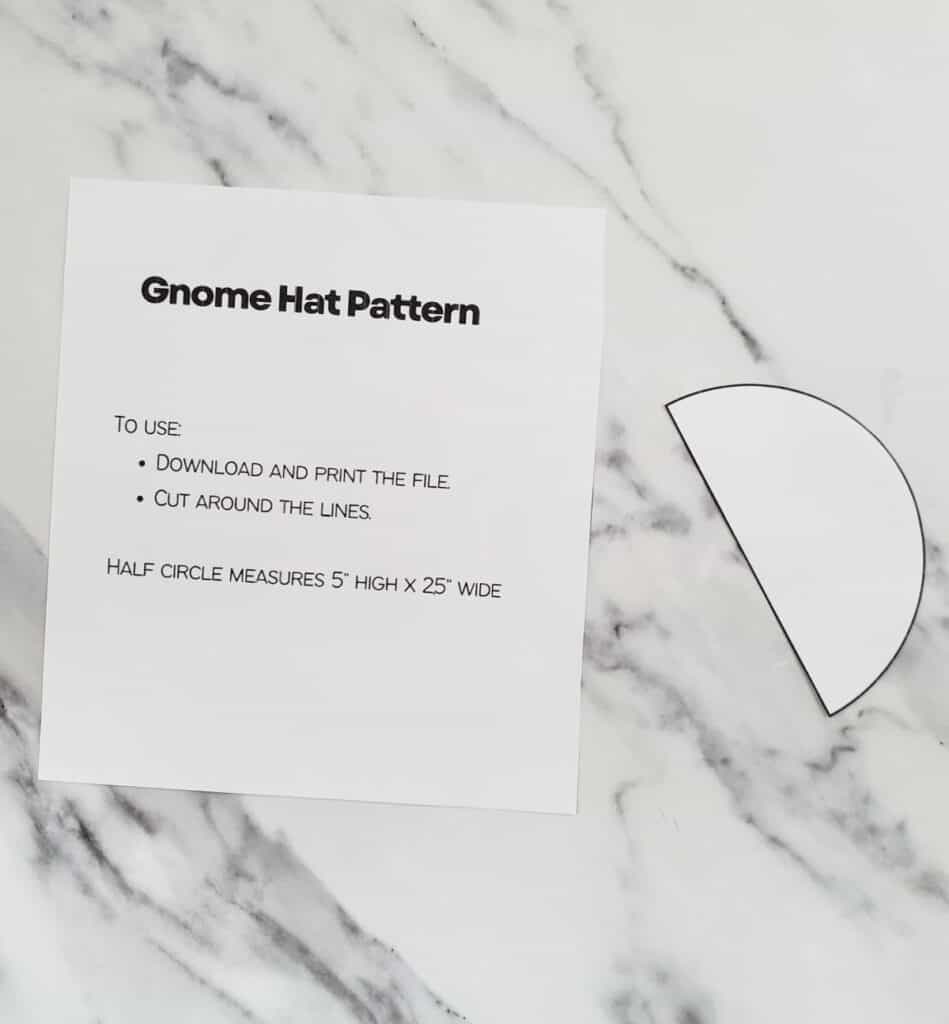
Step 2:
- Cut the pattern out, around the black lines.
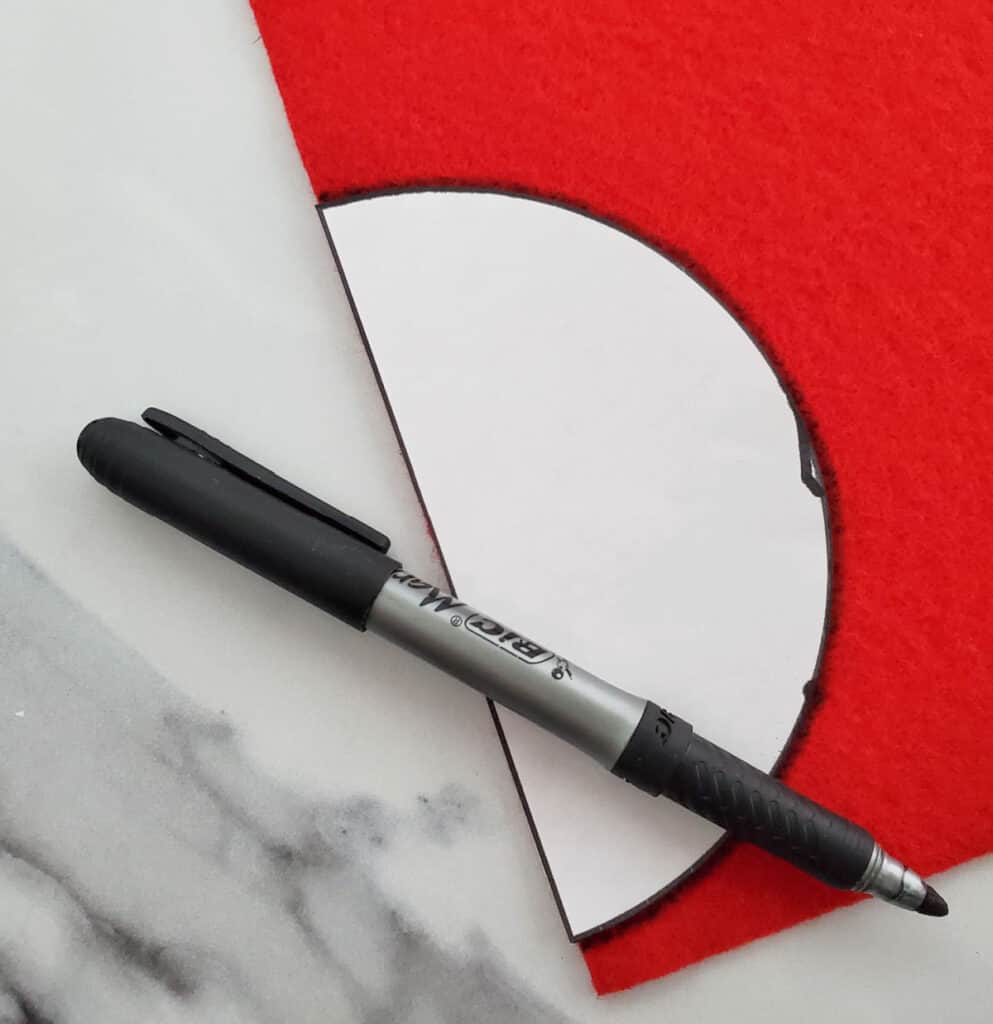
Step 3:
- Use the marker to trace the pattern onto the felt.
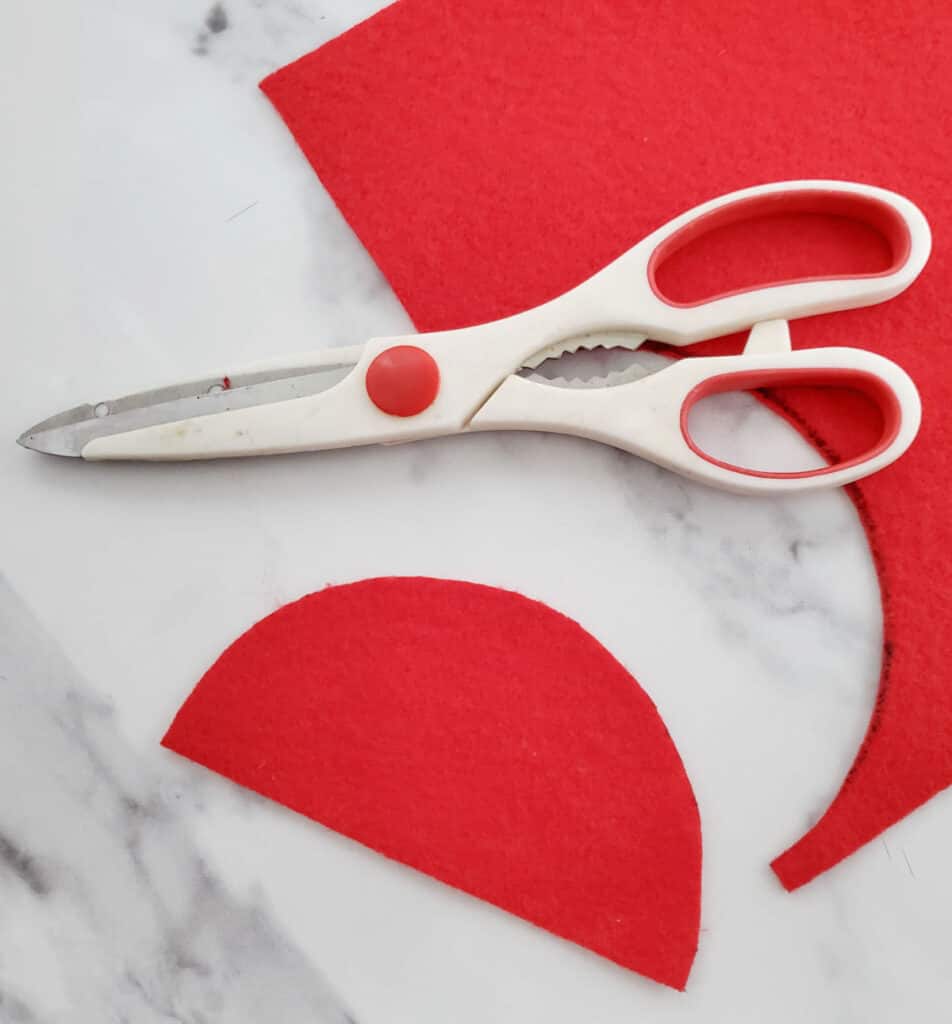
Step 4:
- Cut the traced pattern out, cutting on the inside of the traced marker solid line.
Step 5:
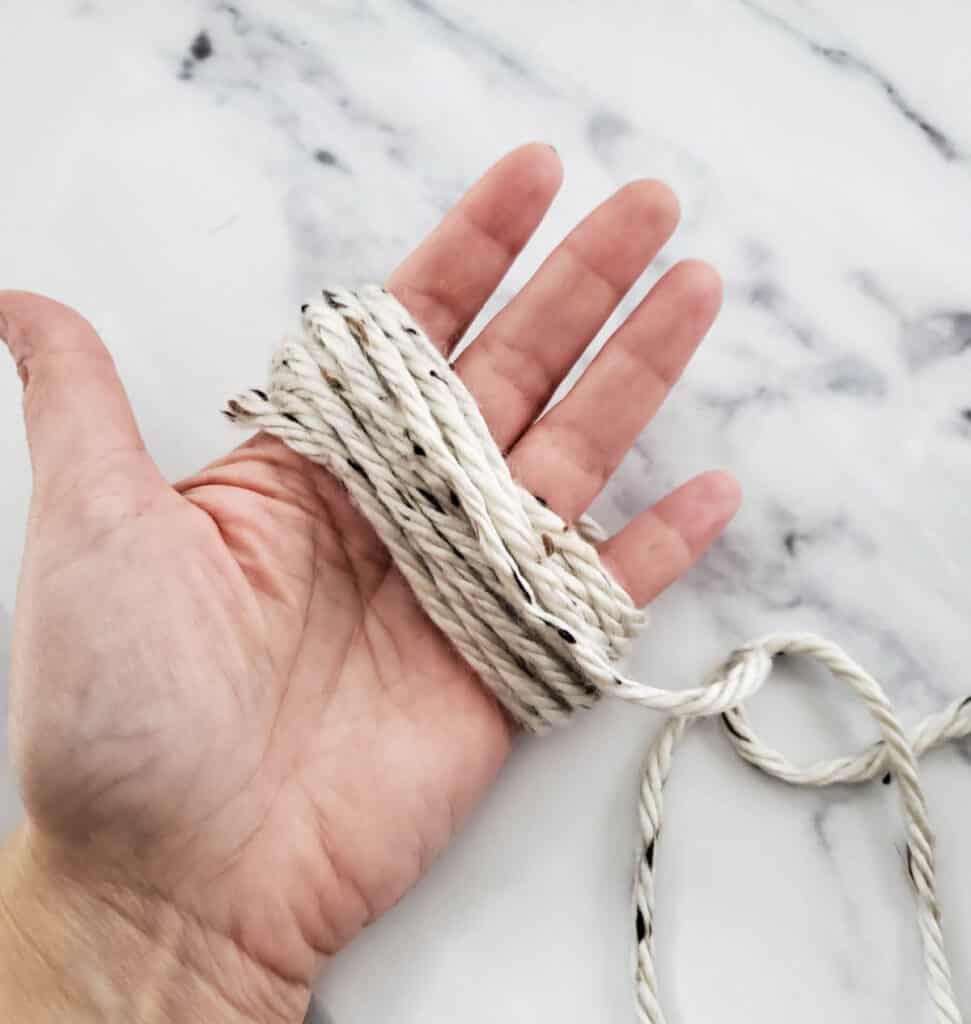
- Grab the end of the yarn, and loosely wrap it around your hand 15 times. Cut the end off. Carefully remove it from your hand and set it down on the table, still wound up as it was on your hand.
Step 6:
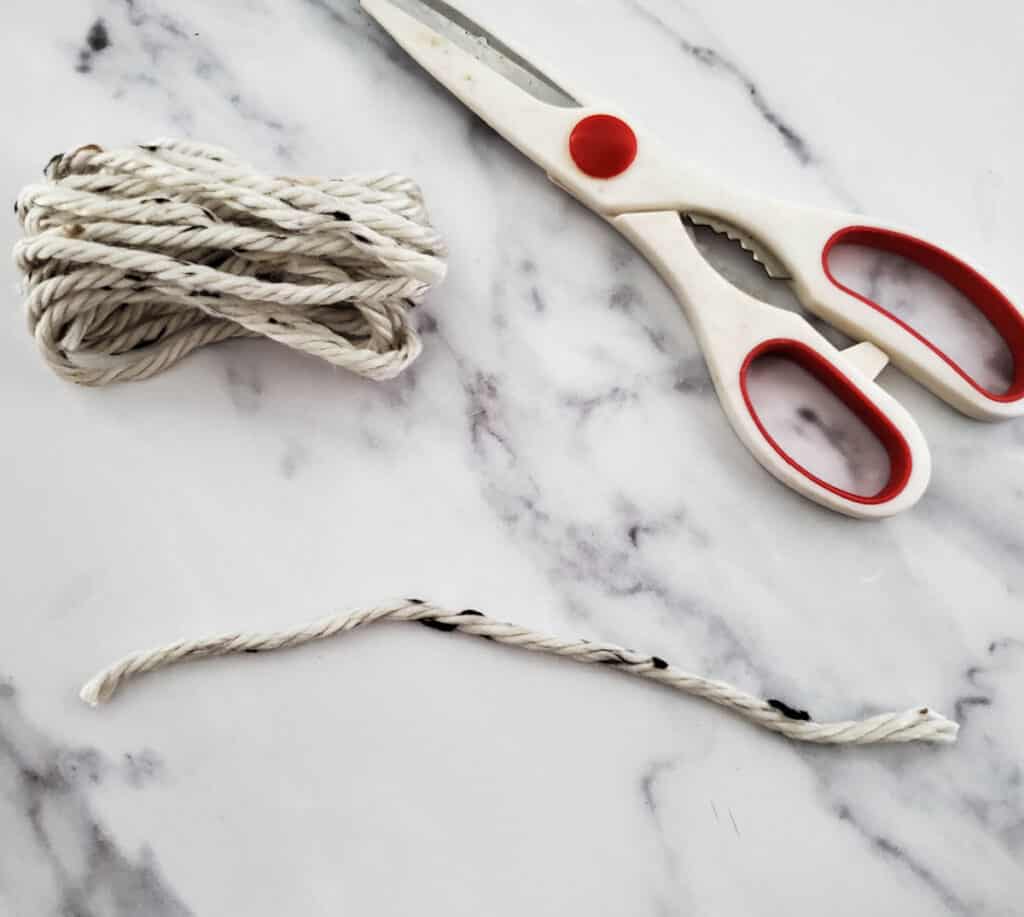
- Cut a length of yarn about 5-6 inches.
Step 7:
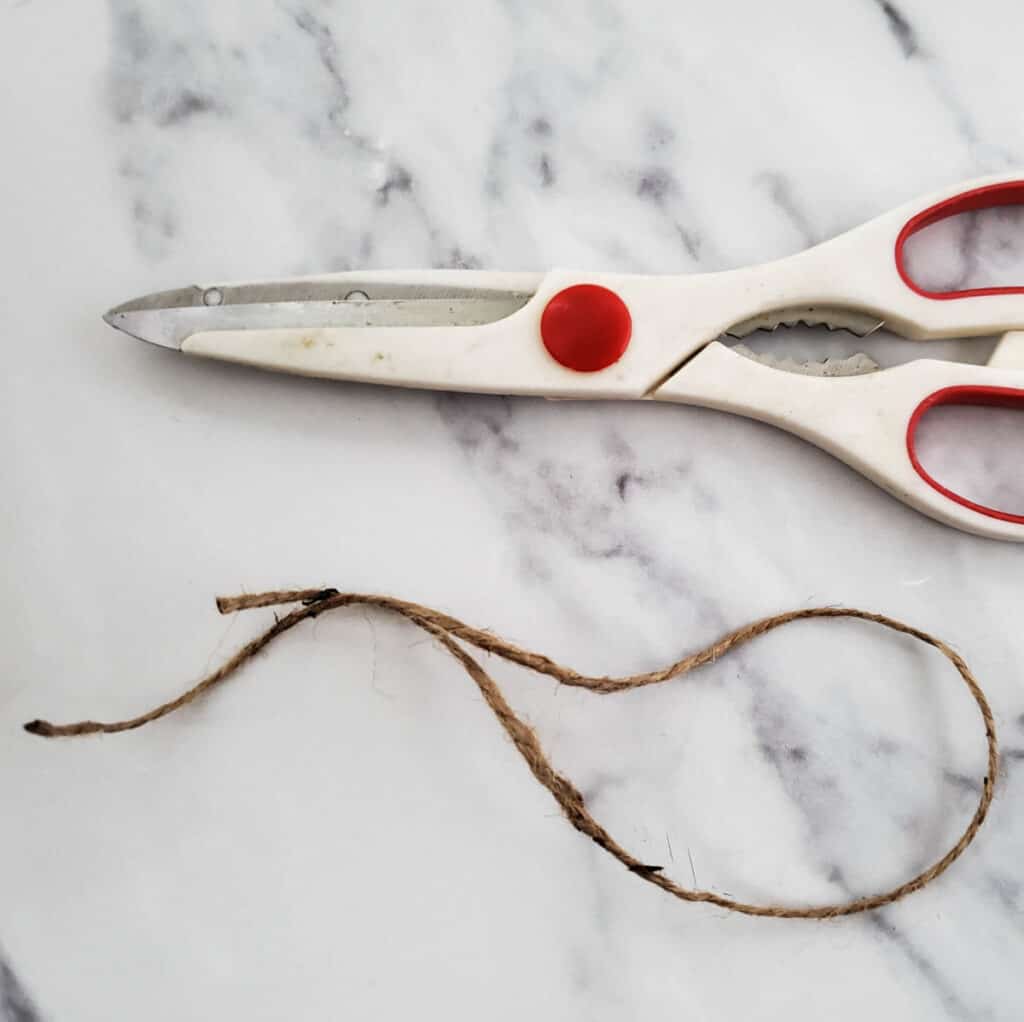
- Cut a piece of twine into a long strand, about 10-12 inches, depending on how big you want your hanging loop to be.
Step 8:
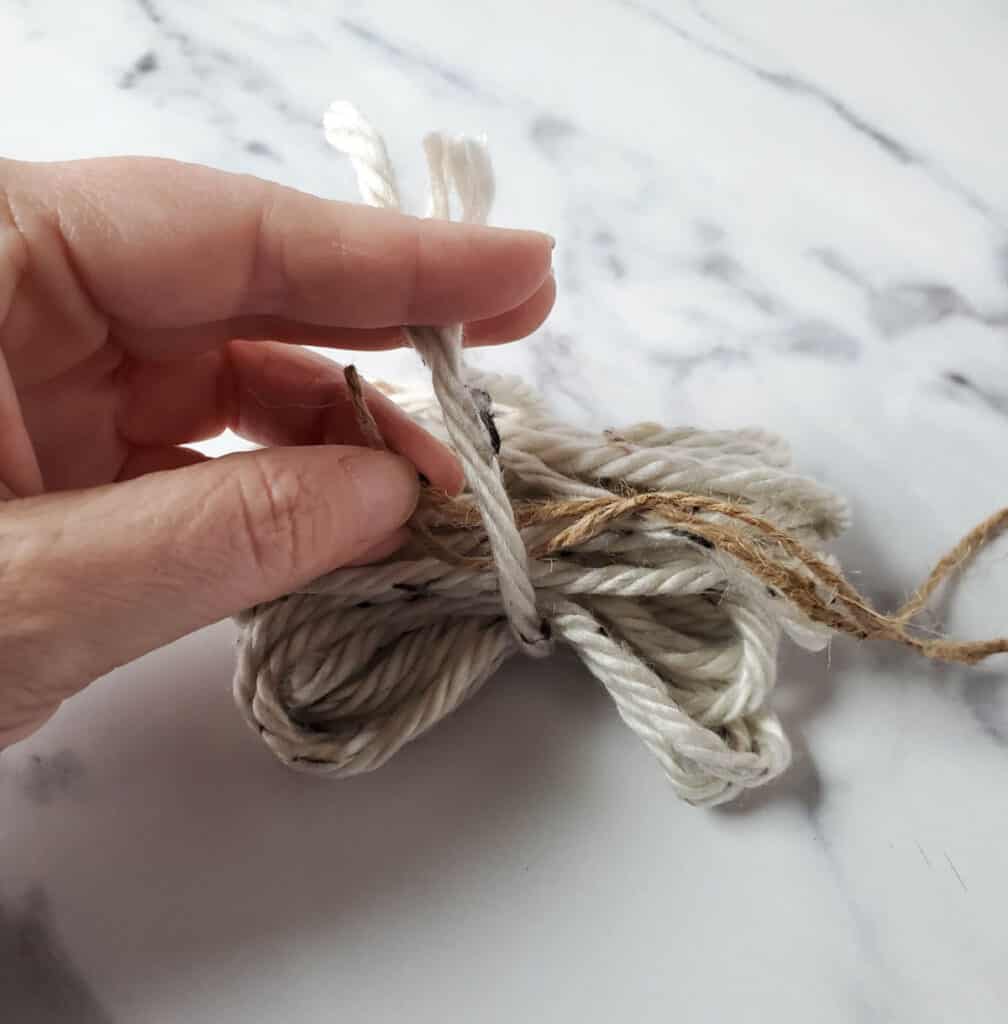
- Lay the 5-6 inch piece of yarn out on a table, then set the wound up yarn right in the center of it. Put the two ends of the twine together, and rest that on top of the wound up yarn, one inch past the center. Now bring the ends of 5-6 inch piece of yarn up, then tie in a double knot. This will secure the wound up yarn.
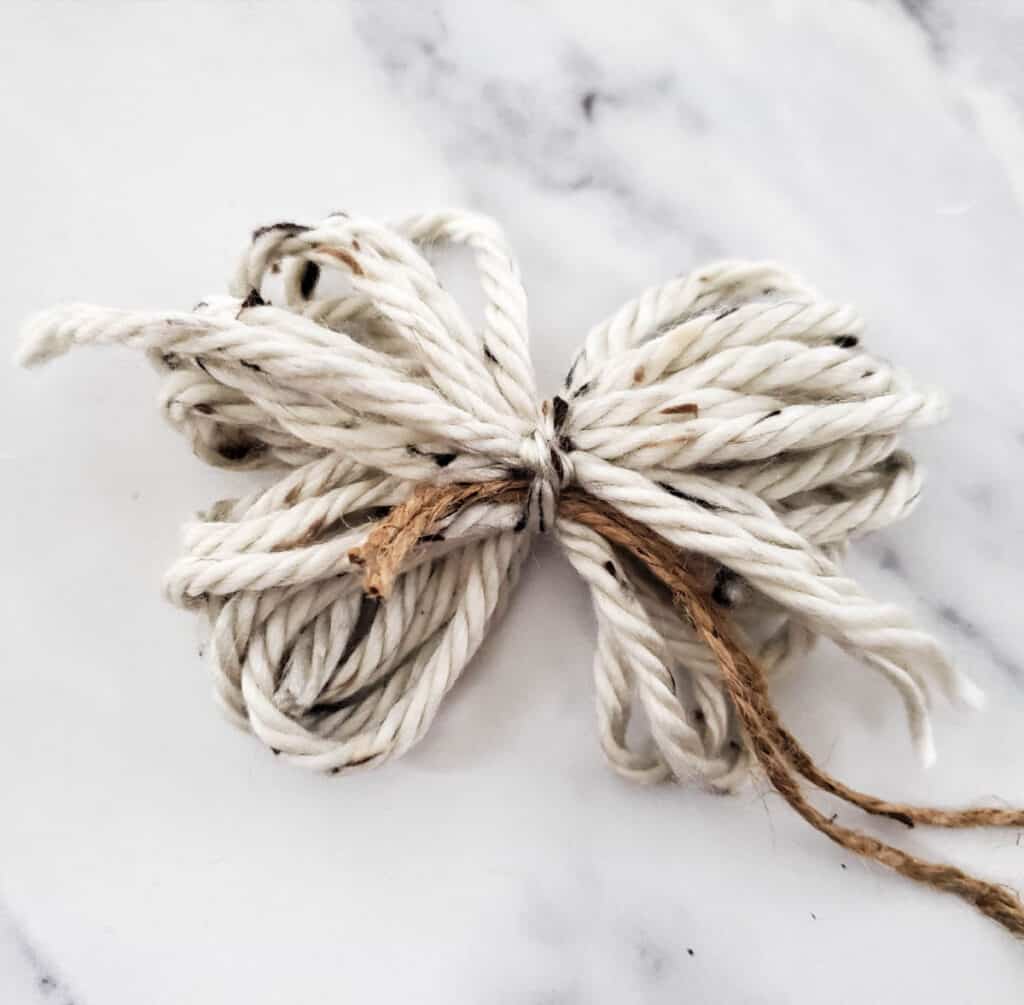
Step 9:
- Now grab the ends of the twine, and wrap the loop of the twine around the ends, then pull through to form a knot. This will secure your hanger onto the project.

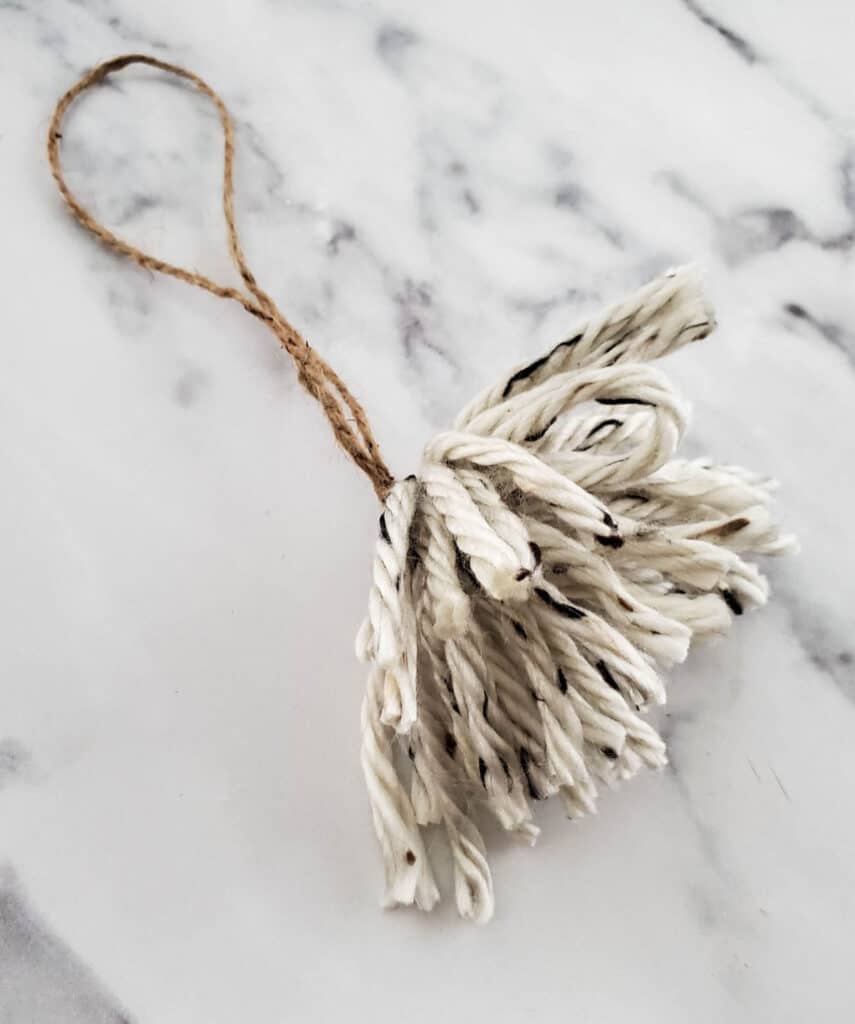
Step 10:
- Use the scissors to cut the loops off either end of the wrapped yarn to make a pom pom which will become the gnome's beard.
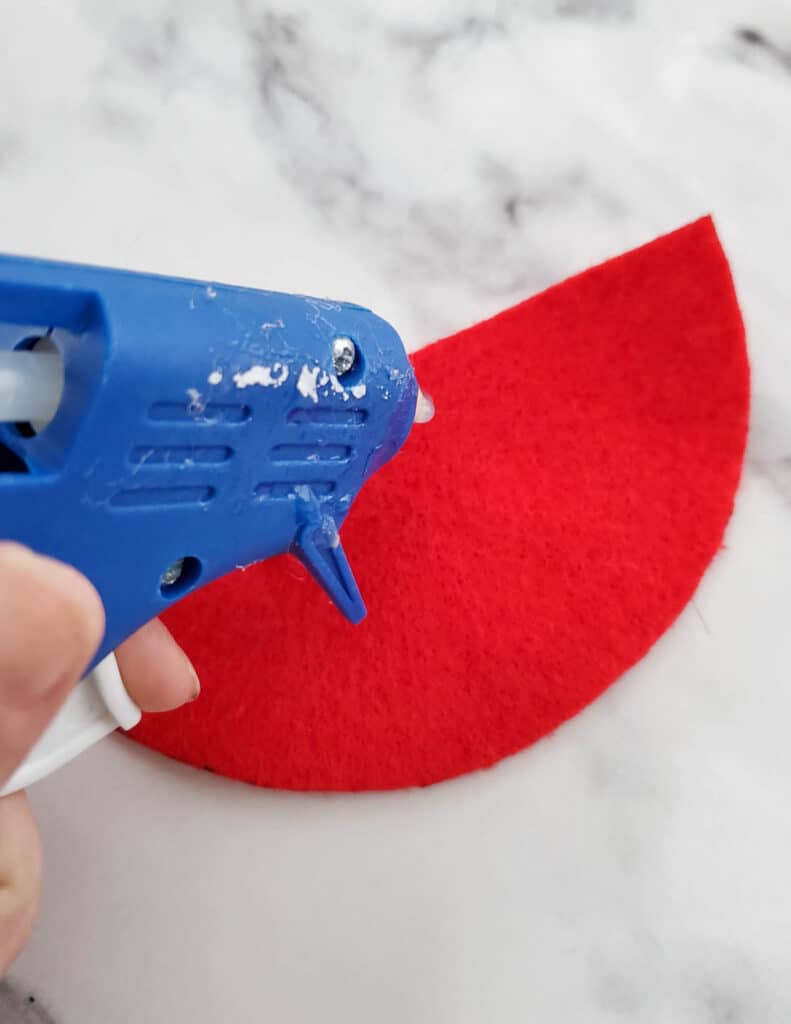
Step 11:
- Use the hot glue gun to apply glue to the upper right half of the hat pattern, starting the glue line slightly right of the center so that your twine loop can fit through in a step below.
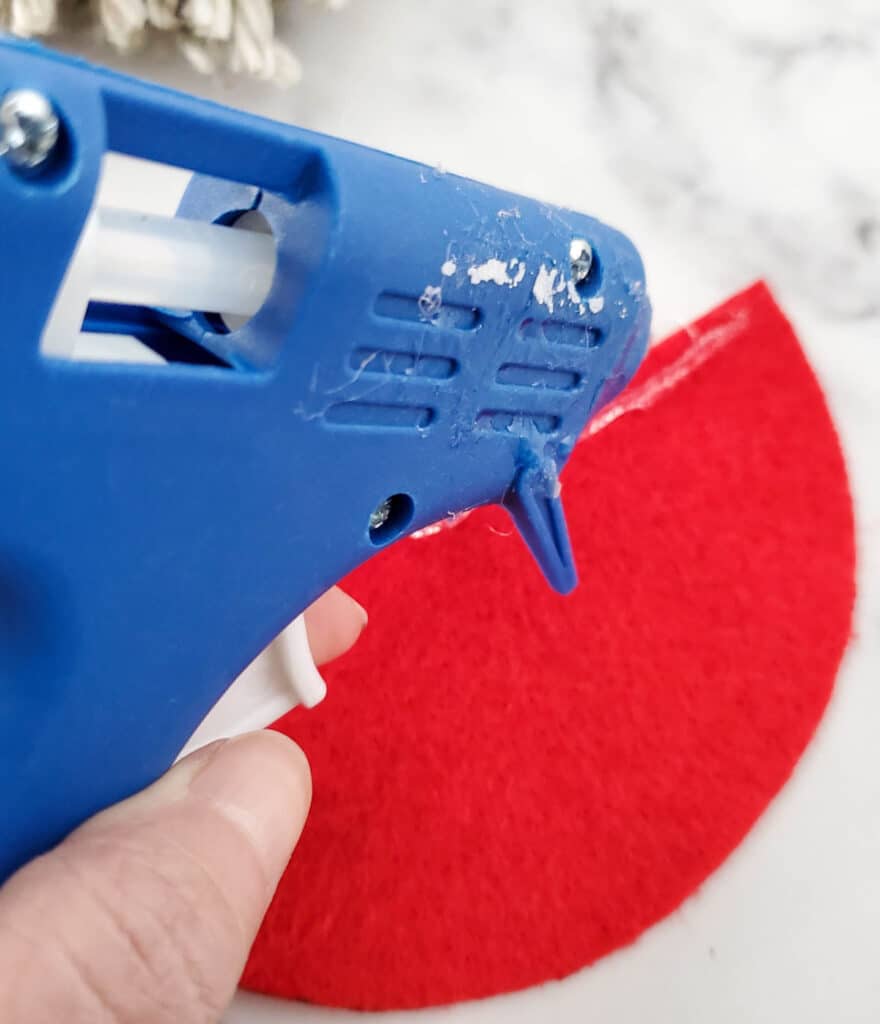
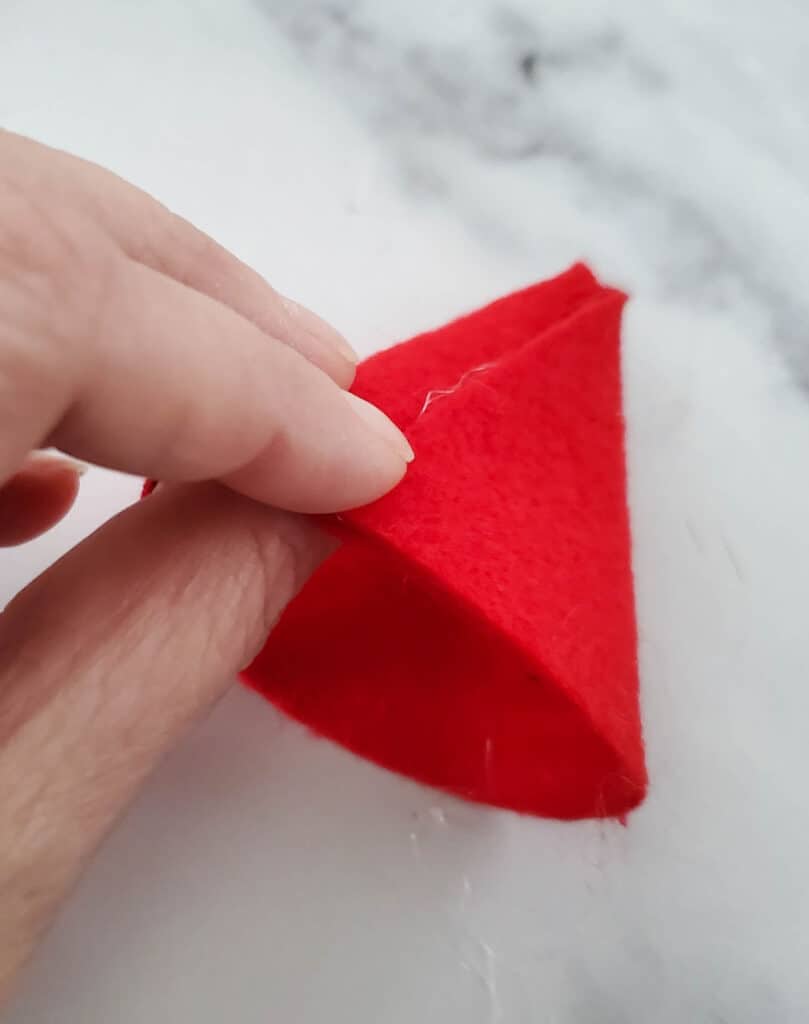
Step 12:
- Fold the glued part of the felt up and over to the right, to form a cone-shaped gnome hat, overlapping edges of the felt cone-shaped hat., but leaving a small hole at the top for the looped twine to go through.
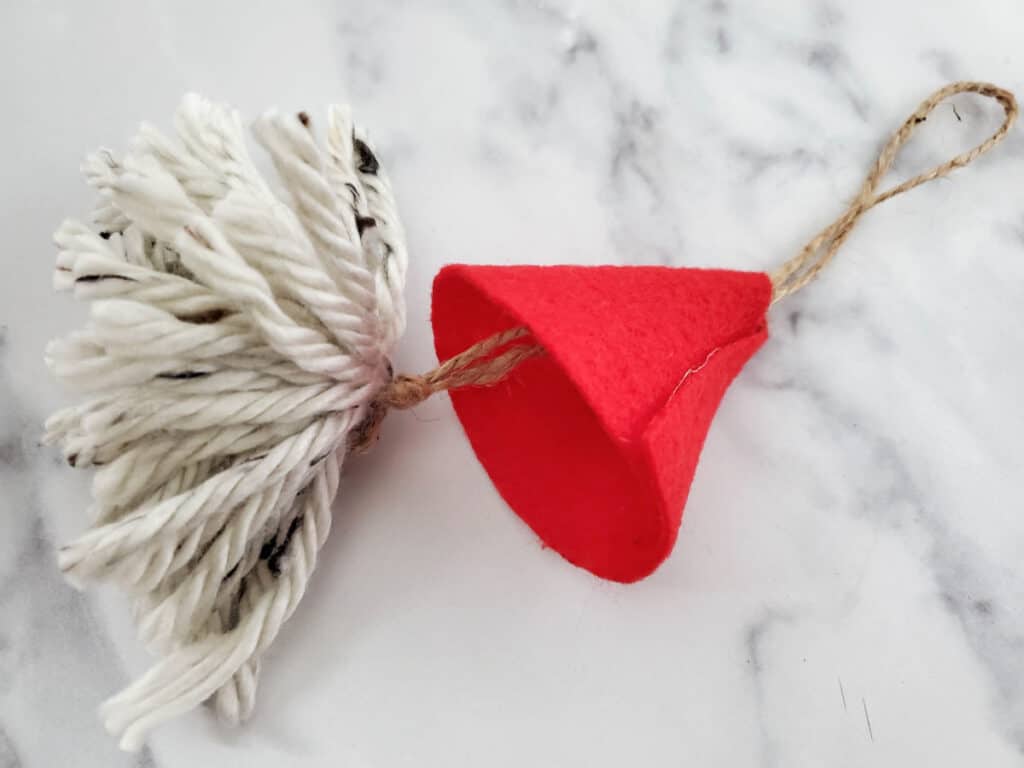
Step 13:
- Now push the looped end of the twine up through the felt cone and through the cone tip of the gnome's hat.
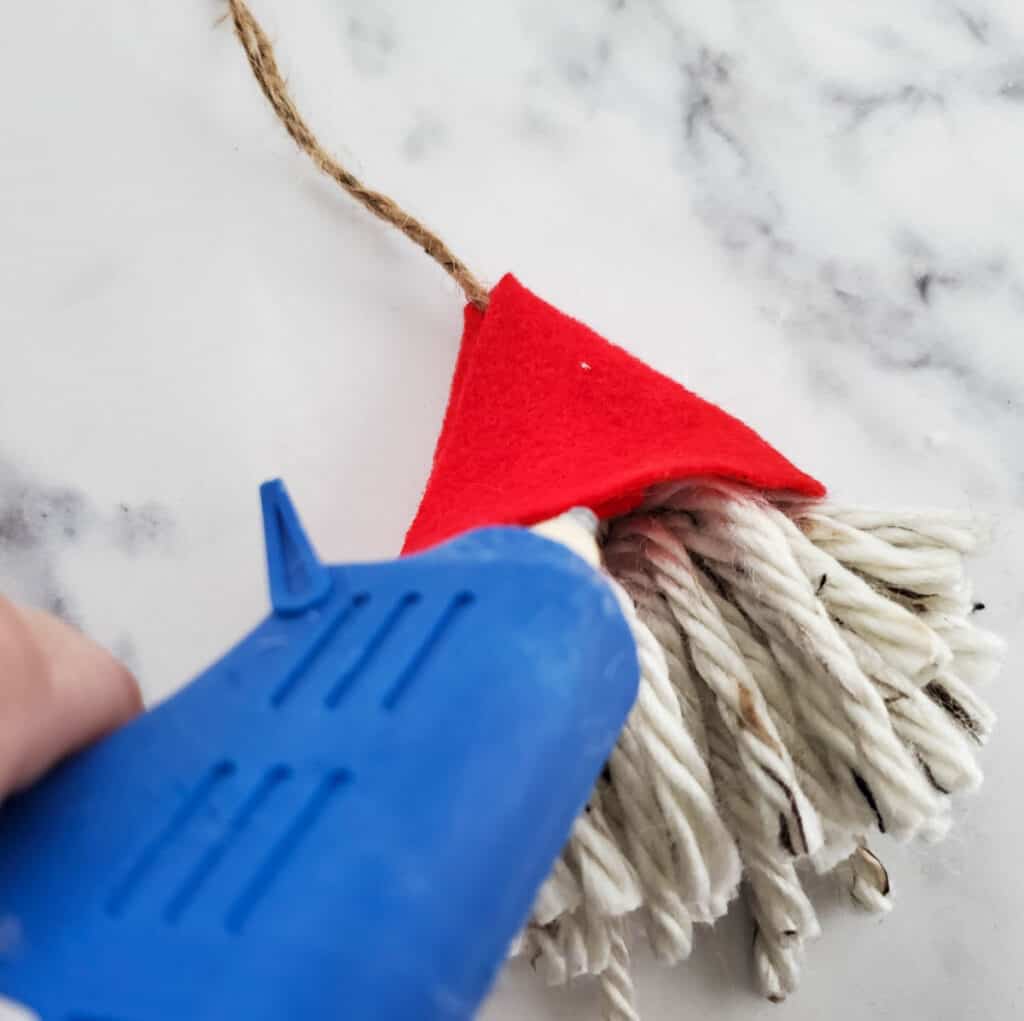
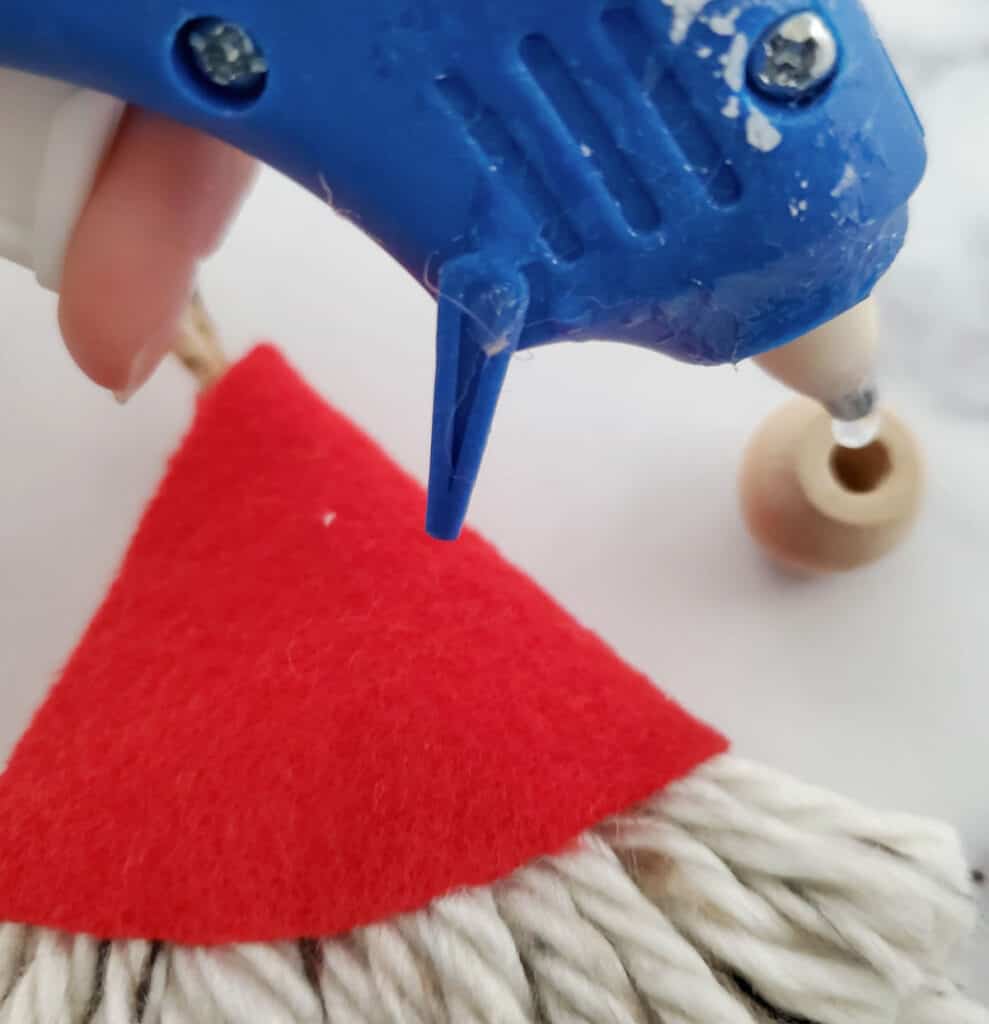
Step 14:
- Use the glue gun along the bottom edge of the hat, to secure the cone hat to the front and back of the yarn pom pom.
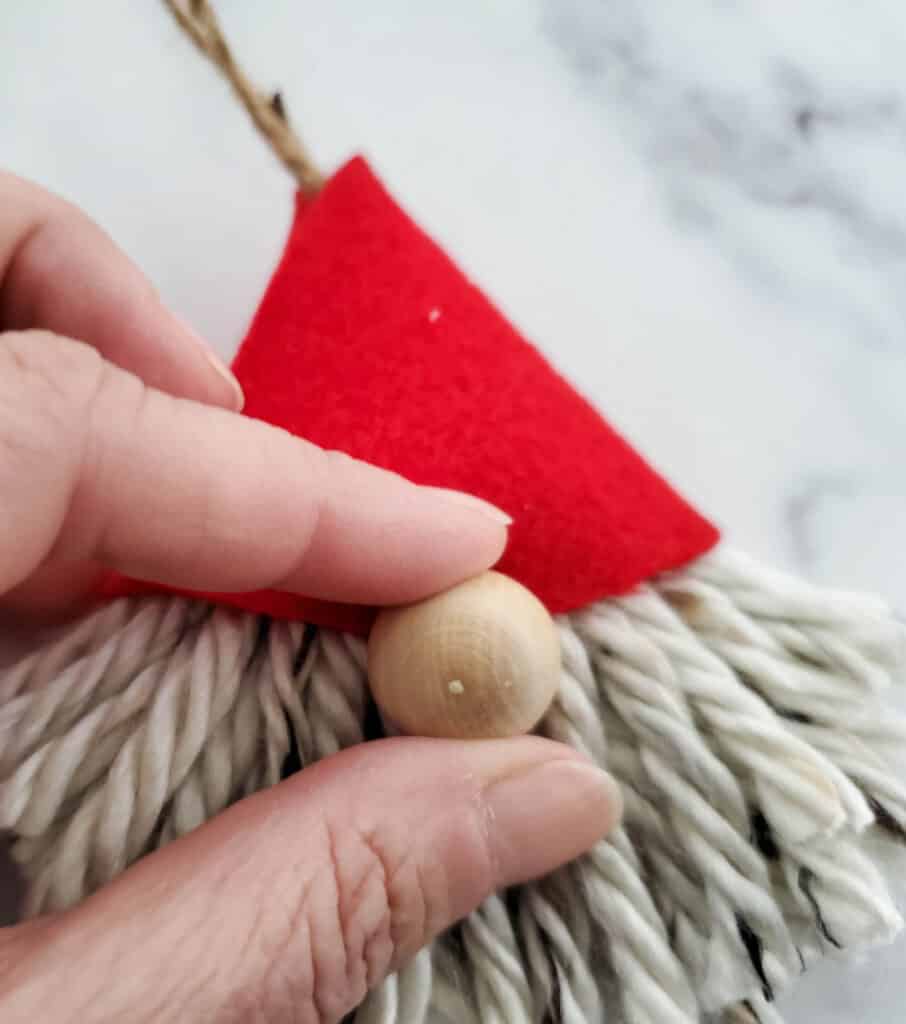
Step 15:
- Apply glue to the flat side of the wooden doll head bead, and glue to the center of the front of the gnome, where the hat meets the yard body to make the gnome's nose.
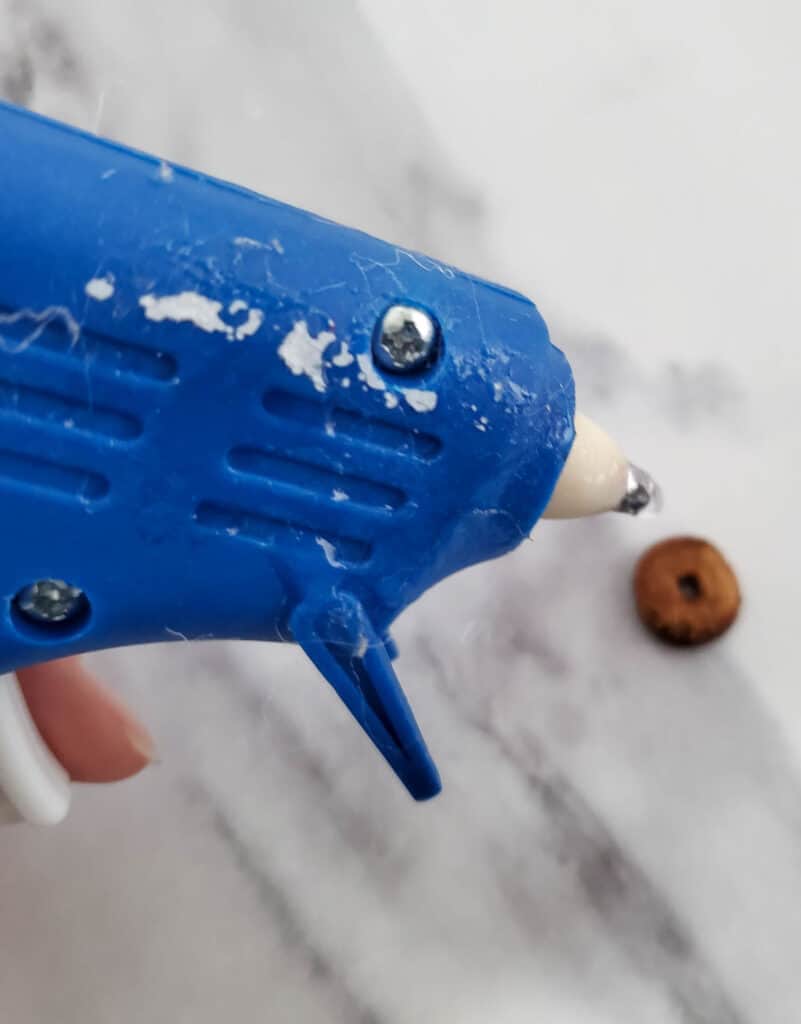
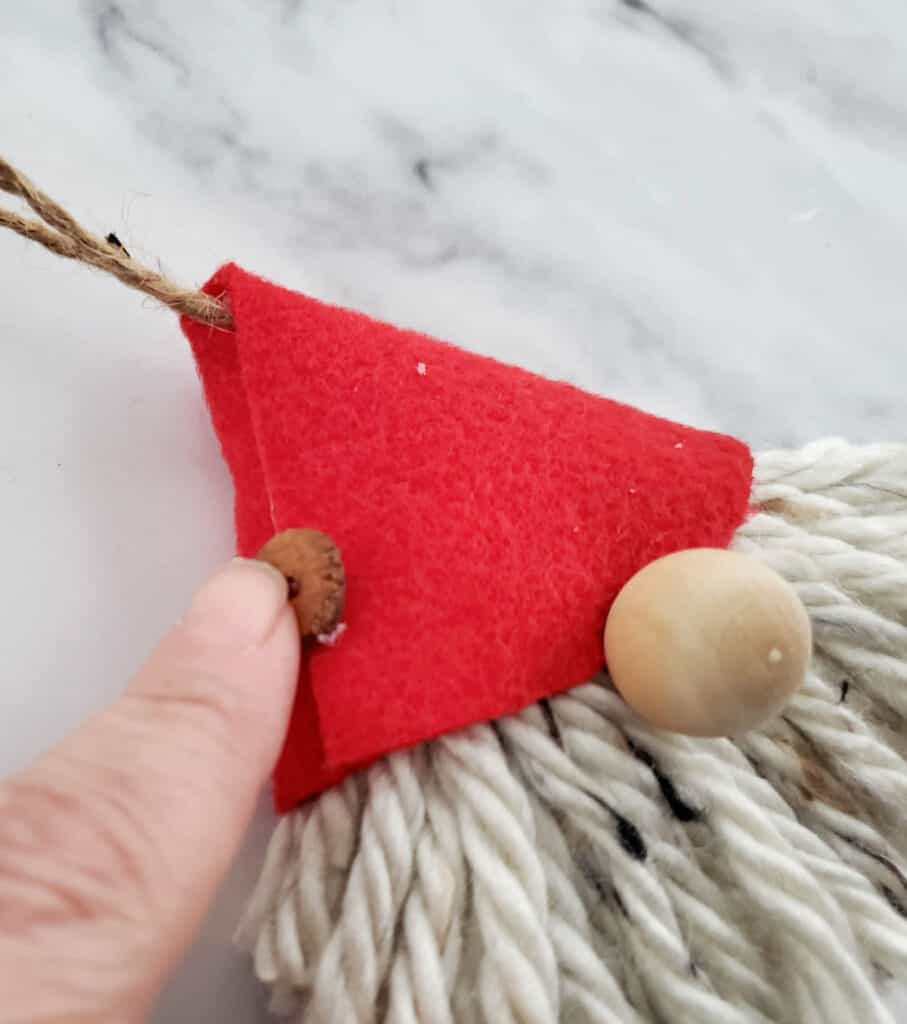
Step 16:
- Apply glue to the back of the bead or button, and secure about ¾ of an inch up, where the felt lines meet on the front of the hat.
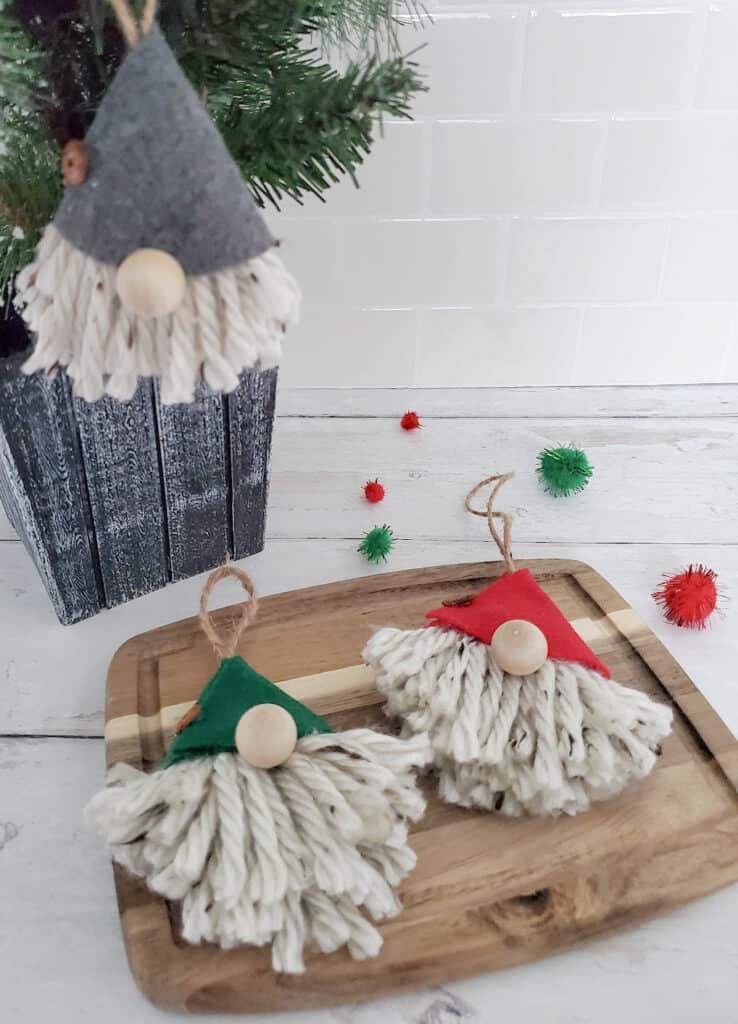
Three finished gnome ornaments!

DIY Gnome Christmas Tree Ornaments
Materials
- 1 pattern print the downloadable gnome hat pattern
- 1 marker black
- 1 pair scissors
- 1 piece felt
- 3 yards bulky yarn
- 1 piece of twine 12" long
- 1 hot glue gun with glue sticks
- ¾" wooden bead wooden doll head, flat on one side
- 1 button or flat bead about ½" in diameter
Instructions
- Download and print the gnome hat pattern. (See Red Button under Supplies section above, to download the pattern)
- Cut the pattern out, around the black lines.
- Use the marker to trace the pattern onto the felt.
- Cut the traced pattern out, cutting on the inside of the traced marker line.
- Grab the end of the yarn, and loosely wrap it around your hand 15 times. Cut the end off. Carefully remove it from your hand and set it down on the table, still wound up as it was on your hand.
- Cut a length of yarn about 5-6 inches.
- Cut a piece of twine about 10-12 inches, depending on how big you want your hanging loop to be.
- Lay the 5-6" piece of yarn out on a table, then set the wound up yarn right in the center of it. Put the two ends of the twine together, and rest that on the wound up yarn, one inch past the center. Now bring the ends of 5-6" inch piece of yarn up, then tie in a double knot. This will secure the wound up yarn.
- Now grab the ends of the twine, and wrap the loop of the twine around the ends, then pull through to form a knot. This will secure your hanger onto the project.
- Use the scissors to cut the loops off either end of the wrapped yarn to make a pom pom.
- Use the hot glue gun to apply glue to the upper right half of the hat pattern, starting the glue line slightly right of the center so that your twine loop can fit through in a step below.
- Fold the glued part of the felt up and over to the right, to form a cone shape, leaving a small hole at the top for the looped twine to go through.
- Now push the looped twine up through the felt cone.
- Use the glue gun to secure the cone hat to the front and back of the yarn pom pom.
- Apply glue to the flat side of the wood doll head, and glue to the center of the front of the gnome, where the hat meets the yard body.
- Apply glue to the back of the bead or button, and secure about ¾ of an inch up, where the felt lines meet.
CUSTOMIZE YOUR GNOME ORNAMENTS WITH DIFFERENT VARIATIONS!
Once you make these, you may want to try and mix up the steps in different ways to your own liking to make your very own diy gnomes! Have fun with it and make your customizations to these cute gnome Christmas ornaments!
- you could make girl gnomes and boy gnomes. Use pink felt for the girls, and give them yarn braids instead of the beard!
- use craft fur for the beard instead of yarn
- use some gold paint or white paint and decorate the felt hat with your own designs such as snowflakes or stars!
Final Thoughts:
I hope you enjoyed making your own adorable Christmas Gnome Ornaments! Check back regularly as I hope to have more DIY craft tutorials posted soon. If you enjoyed this and want to make something similar but different, check out all of my DIY Soaps, Scrubs & Bath Bombs tutorials!
OTHER DIY CRAFT/TUTORIALS YOU MAY BE INTERESTED IN:
Easy DIY Snowman Wood Bead Ornament Tutorial
Easy DIY Painted Bumble Bee Rocks Craft Tutorial
Easy DIY Painted Strawberry Rocks Craft Tutorial
Easy Painted Pumpkin Mason Jar Craft
Want to Remember This?
Pease share "Easy DIY Gnome Christmas Ornament Tutorial" on Pinterest to your favorite Christmas or Craft board!
Jen
These are so cute & easier than I thought they would be to make! We'll have to try these!
Tamara
Thanks Jen! Happy Holidays! 🙂