As an Amazon Associate I earn from qualifying purchases.
You can read my full disclosure statement here.

Staking Indeterminate tomatoes is a must. Today, I will be sharing with you how to stake tomatoes cheap and easy with this DIY tutorial on how to build a tomato plant support system using wooden stakes and chicken wire!
Tomato Cages, Stakes and/or Trellises Not Working For You?
Than you are in the right place! I got tired of my tomato support cages falling over, my wooden tomato stakes not being tall enough, the trellis system not being big enough, the twine or string breaking in a weave system. So my husband and I set out to build something that works!
This DIY tomato support system uses inexpensive 2x2x8 wooden posts and chicken wire or welded wire, whatever you might have on hand will work. It is an excellent support for tomatoes in pots, or in the ground!
The Benefits of Freezing Your Tomato Harvest
How to Transplant Tomato Seedlings
Seed Starting 101: Planting Tomato Seed
Our favorite Homesteading & Gardening things in our Amazon Store!
Our Garden Harvest Tally Spreadsheet is now available!
How to Stake Tomatoes in Pots
Living in the PNW, in our cool short summer growing season, I grow my tomatoes in pots, both in the greenhouse, and outside. It helps keep the plants & roots warmer, and I find that I get a bigger harvest growing them in pots.
But I struggled to find a way to support the indeterminate tomato plants while growing them in pots. That is how this system was born.
How to Stake Tomatoes or Support Tomatoes in a Greenhouse
After unsuccessfully growing tomatoes outside, we invested in this greenhouse. It is rather large, at 10x20 and is my favorite gardening purchase EVER. (I secretly want a second one, to expand my Making Money Growing Plants project each spring.....shhhhh! Don't tell my hubby!) This is where our system was first used.
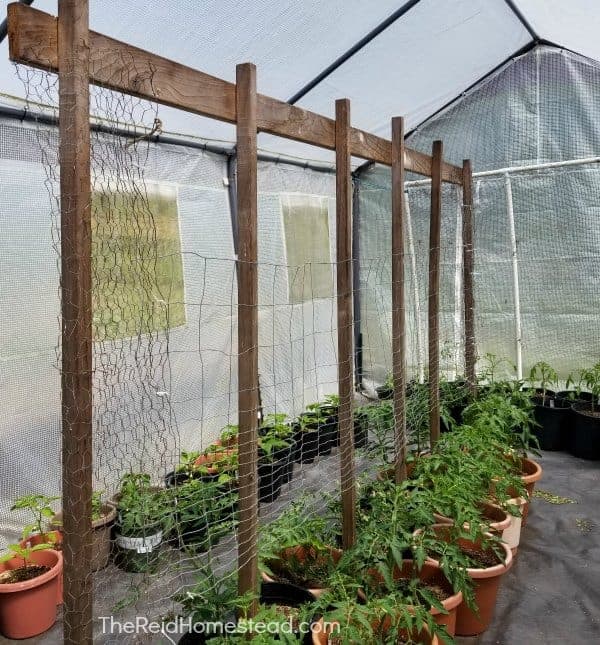
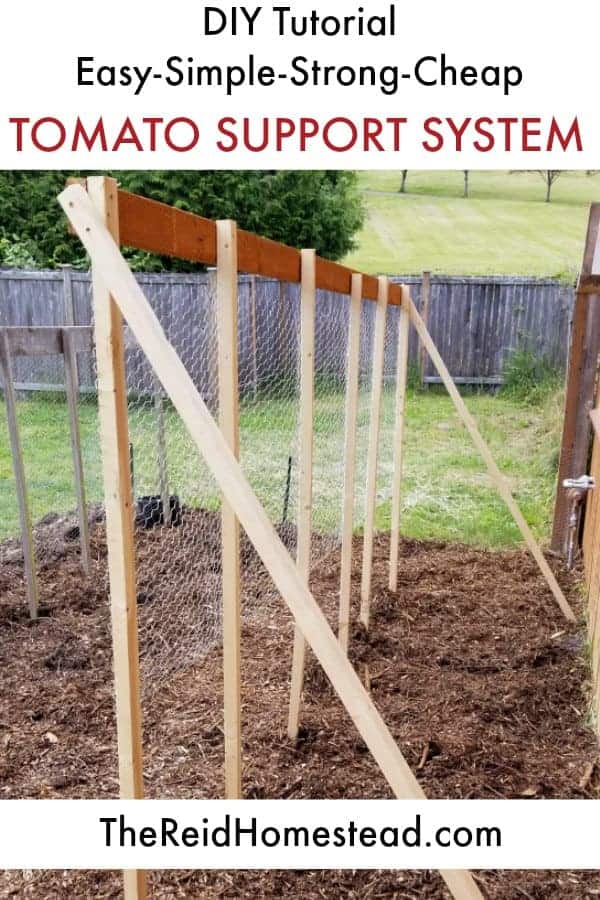
As you can see, it is a simple system of 2x2x8 wooden posts, spaced around 24-30" apart, with a 2x4 across the top. Then we placed scraps of welded wire fencing or chicken wire across the posts. As the tomatoes grow taller, I simply tie the plants gently to the chicken wire or wire fencing, using baling twine.
You can see in the back of the greenhouse, we tried to replicate the system using PVC. I would not recommend using the PVC, as it was rather flimsy and not strong enough. We ended up having to tie the whole system to the greenhouse frame so it wouldn't fall over.
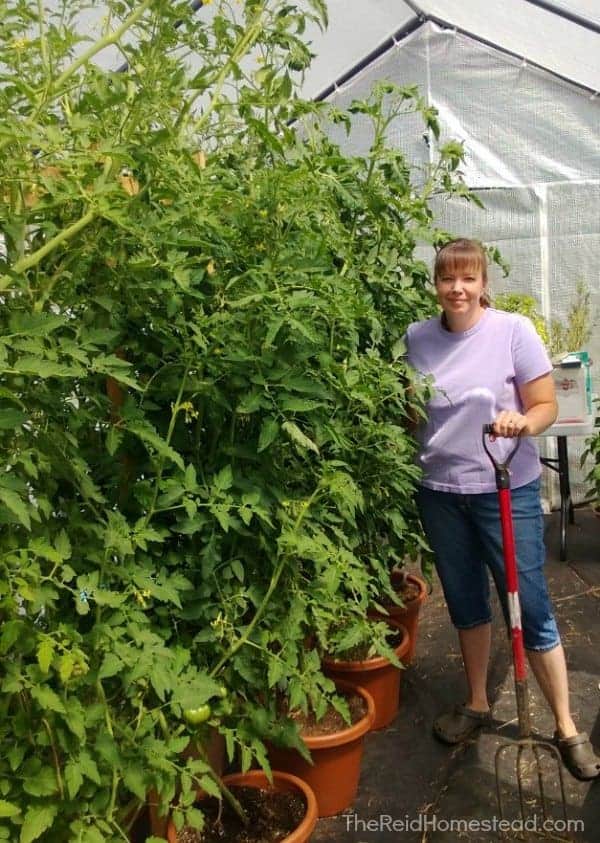
As you can see, the plants grow beautifully on this system! They love it! I do prune my tomatoes, especially the lower 12-18" and I remove most of the suckers. It is hard to tell in this picture but I do! I will post a tutorial on pruning tomatoes soon.
Trying Our DIY Tomato Support System Outside
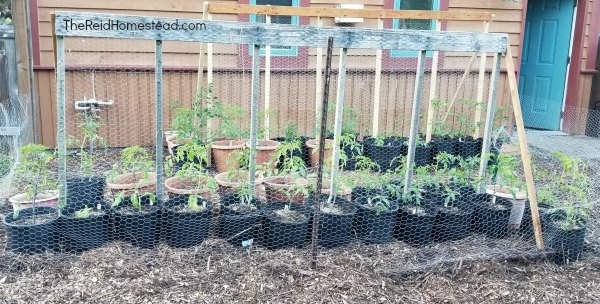
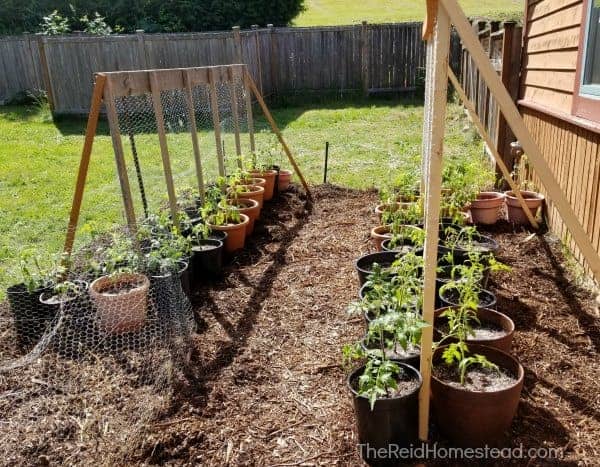
This system worked so well, I decided that just maybe, it would work outside too. So we set one up outside a couple years ago.
First we pounded in the posts, added a scrap 2x6 piece of wood to the top, added some diagonal bracing, and the chicken wire. I am a huge fan of the Back to Eden style of gardening, so then I lay down cardboard, and piled on a good 6-8" of wood chips, to suppress all the weeds.
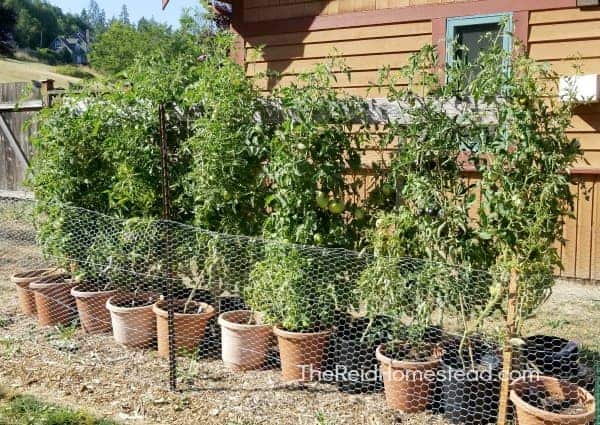
As you can see from this photo, taken near the end of the growing season, the tomatoes did very well! I harvested just as much as I did from the greenhouse! And because I am a go big or go home type person, we decided to add another system between this one and the house this year.
So read on for a complete step by step tutorial of how we built it!
Step by Step Tutorial for Building a Tomato Support System
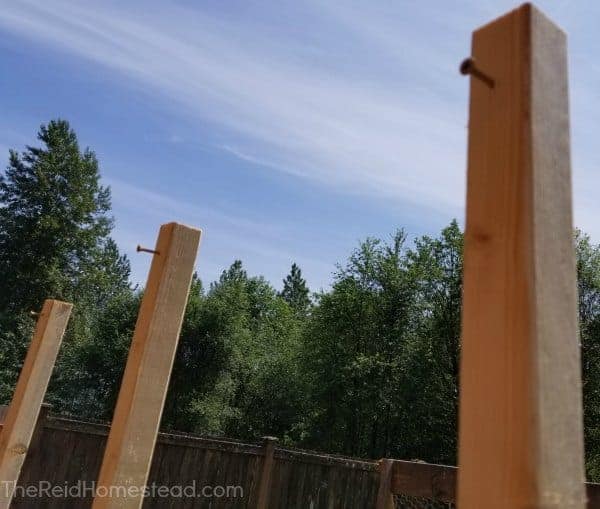
Putting the posts in:
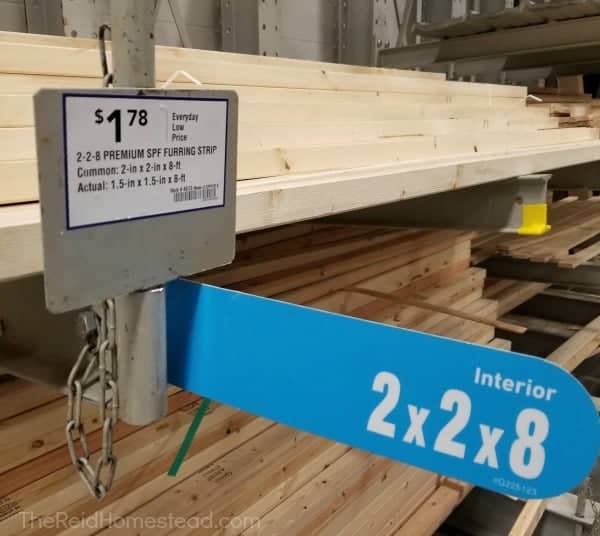
First, we had to go to Lowes, and acquire the 2x2x8's that we needed, they are also known as furring strips. As you can see, at $1.78 each, they are pretty inexpensive.
Yes, they may rot in time as they are not cedar or some other long lasting hard wood. But my system in the greenhouse went in back in 2010 and is still doing great. Our outside system, has been in place now for 4-5 years? And is still holding up strong.
So just know that it won't last forever, but it is cheap enough to easily replace.
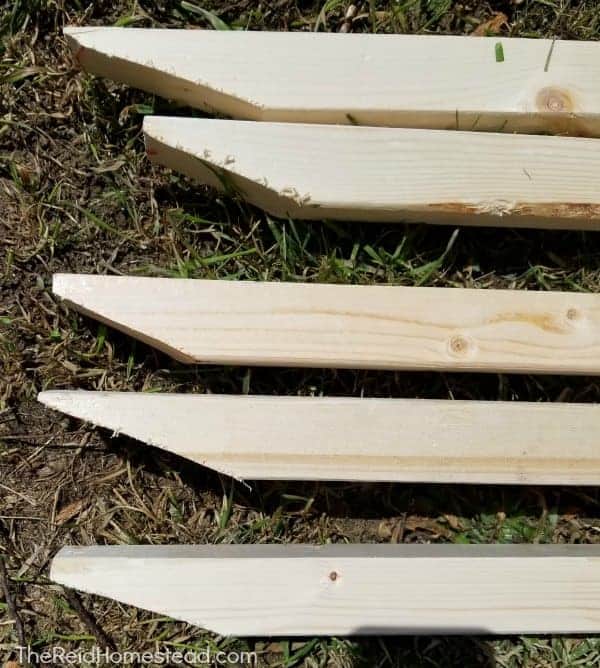
Next, my husband used his table saw to angle one end of each of the posts, to make pounding them into the ground easier.
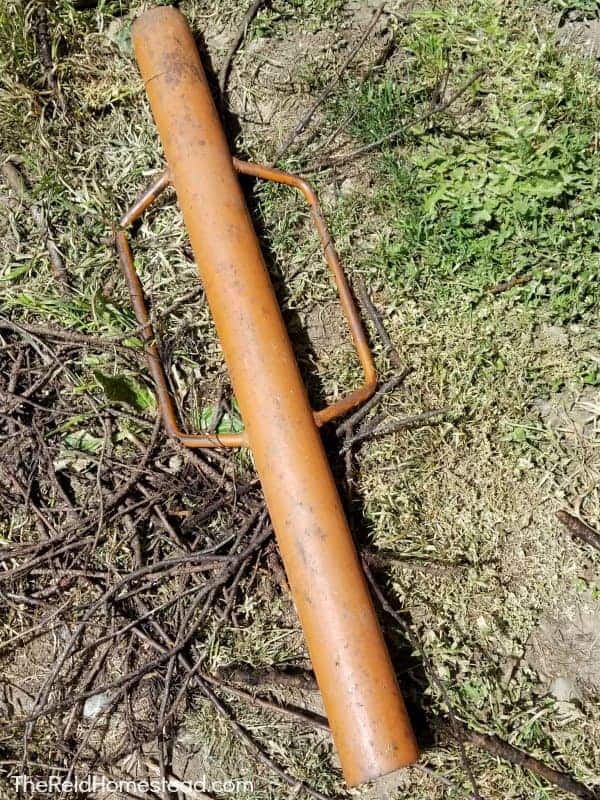
Than we got out our handy dandy post pounder. Be careful with this. I've known several folks who have lost their balance and pounded their head with this by accident. Seriously! Not good.
It is very very heavy! So please be careful. You may also want to grab a sturdy step stool at this point also.
It is also a good idea to grab a piece of wood that is as long as the row you are putting in, and use it as a guide to help you pound your posts in, in a straight line. See that piece of 2x4 lying on the ground in the photo below? That is our "straight line guide".
We have also marked on it every 2' or so. So you line a 2x2 post up with a mark on the board, and use the post pounder to put the post in.

We only pounded the post in about 1 foot or so. You only need to anchor it into the ground. Each post stuck above the ground approximately 70" when we were done.
It is also ok if the posts don't all go in perfectly vertical. That is what the cross bracing along the top is for, to hold them all in a straight line. We even had one post snap crackle and pop a bit, but that is ok. The chicken wire will hold it all together.
Assembling the other pieces after the posts are in:
Next, it is a good idea to add a screw to the top of each post, to make screwing the top support piece in easier. Just start each screw so it stays securely in the wood post.
Than grab whatever spare 2x you might have lying around, a 2x4 or 2x6 works great. You will need a helper at this point, to help hold this piece up, while it gets screwed in. If you are a little OCD, make sure it is level first.
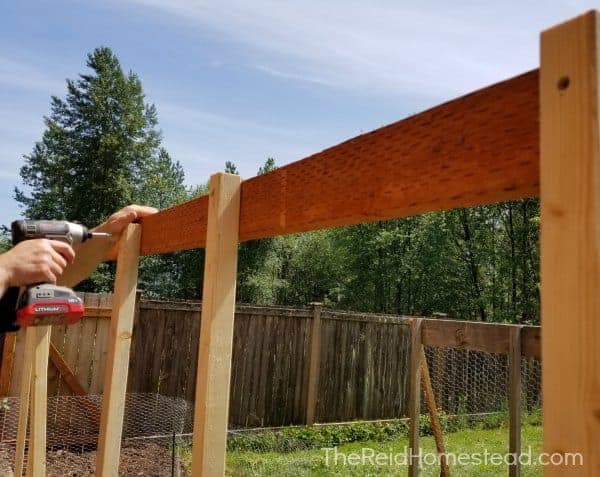
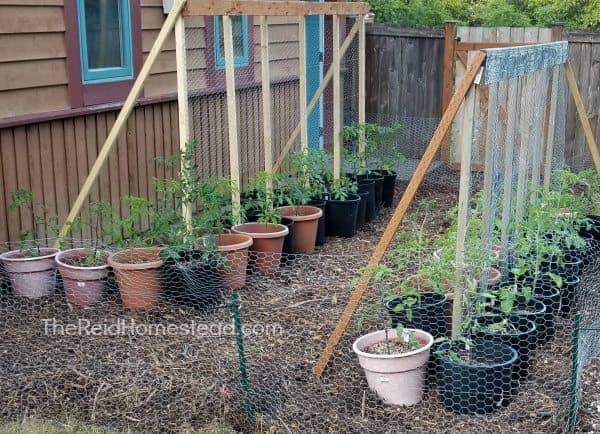
Next, you want to give this vertical structure, some horizontal support by creating some diagonal supports on either end. In our first system shown at the top of the page, we placed a diagonal support at each end, going in opposite directions.
First, we placed a piece of scrap wood at the bottom of each end post, sticking out on either side perpendicular to the last end post. Than use another 2x2 and lay it diagonally from the end of the short piece of wood on the ground, to the top of the support system.
Use a level and a helper, to hold the vertical supports level vertically. While they are being held level, screw the diagonal support brace in at top and bottom.
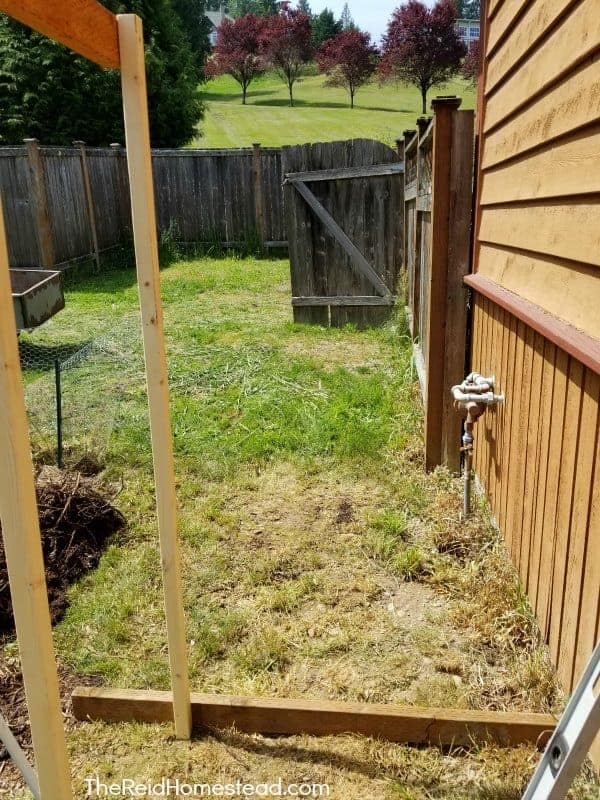
Because this second support system was so close to the house, we actually used the concrete foundation of the house, to wedge our diagonals up against. so they both went on the same side of the support system. I held the vertical support posts level vertically, while my hubby screwed the diagonal support into the top bracing and bottom bracing.
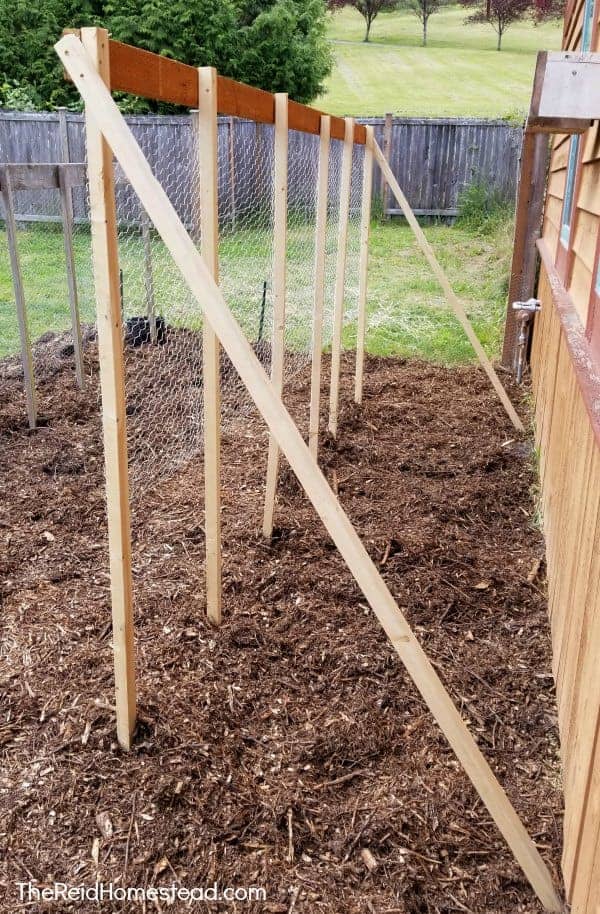
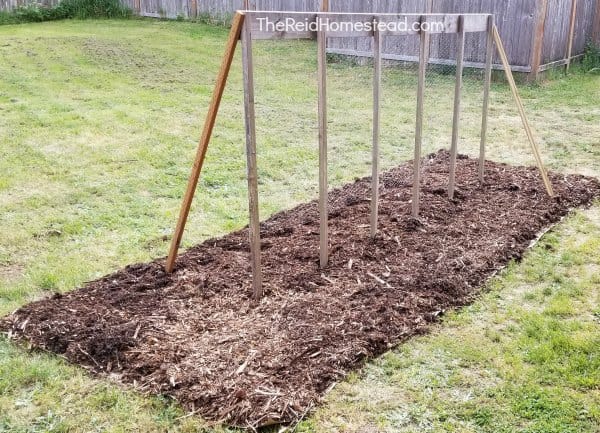
The last thing to do was to staple the chicken wire to the 2x2 posts from end to end. Than we applied the same back to eden style mulching method, to keep all the weeds and grass from growing.
We have pups who share this area, and who like to snack on the tomatoes, so we also had to put up a quick chicken wire fence to keep them out. Hopefully we can upgrade this fence one day, cause it's a little flimsy!
And here you have the finished tomato support system!
View from the other direction:
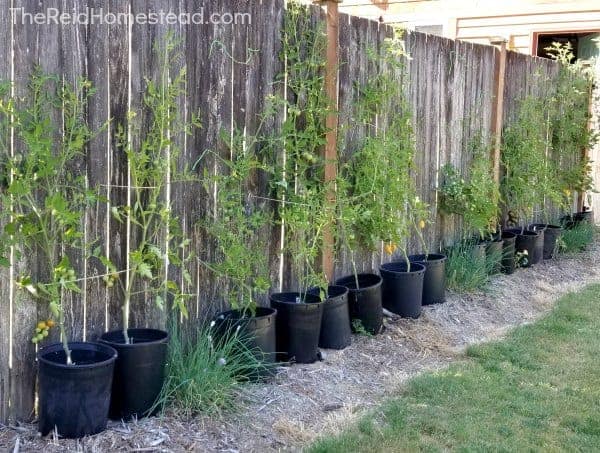
How to Support Cherry Tomatoes on a Fence
Although the tomato support system above would work for all types of tomatoes, I also wanted to share how I support my cherry tomatoes. I LOVE tomatoes, and use the tomato support systems to grow all my heirloom and roma/paste tomatoes, so I needed something else for my cherry tomatoes.
We have a wood estate style fence, that faces south east. I place my cherry tomato pots along this fence, and use baling twine and a staple gun, to tie the plants up with as they grow.
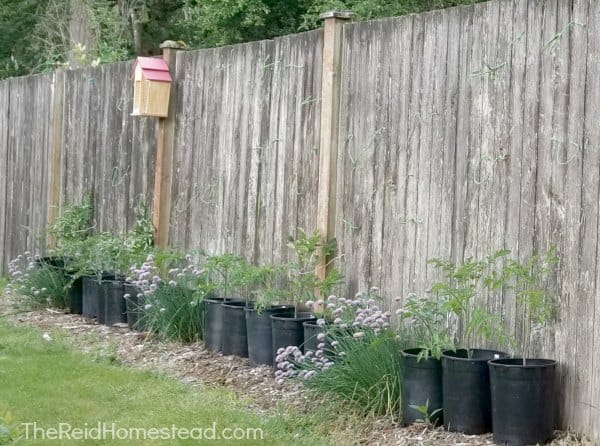
As the tomato plants grow, I simply cut a piece of baling twine anywhere from 12"-24" long, staple one end on the fence on one side of the plant, loop it around the plant and staple the other end to the fence. I do this every 18"-24" whenever the plant has grown enough that I see it needs more support.
It is simple and easy, and works really well.
My Other Articles on Growing Tomatoes:
How to Transplant Tomato Seedlings
Free Tomato Plants from Cuttings
How and Why You Should Prune Tomato Plants
The Benefits of Freezing Your Tomato Harvest
Tips on How to Save Your Own Tomato Seed
How I Make Money Selling Tomato and Pepper Plants
Growing Tomatoes - From Seed to Harvest
I hope this was helpful! Please let me know if you have any additional questions on growing tomatoes!
Want to Remember This?
Please Pin this article "DIY Tutorial - Tomato Support System" to your favorite Gardening or Homesteading board on Pinterest!
Jenn
This looks like a good system! Thanks for the tutorial! Found you on Farm Fresh Tuesdays!
Tamara
Hi Jenn, Thanks for checking me out and I hope this tutorial works for you!
Nancy
A good alternative is cattle panels. I get them from Tractor Supply. They cost about twenty dollars, but they are quite sturdy and they last for years.
Tamara
Hi Nancy, Yes! They are a great idea also!
Ronald
I am a 70 year old man with a part time job and I am going to the home and garden center as soon as it opens to get the supply's I will need. Already looking forward to fresh tomatoes of my own.
Hope
Thanks for this! How big are your tomato pots?
Tamara
Hi Hope, I have grown tomatoes in as small as 5 gallon pots, but the bigger the better! If you can do 10 gallon, that is probably ideal.