As an Amazon Associate I earn from qualifying purchases.
You can read my full disclosure statement here.
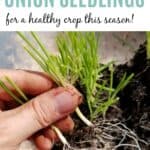
This article will teach you how to plant onion seedlings for a healthy robust onion harvest in late summer!
When and Where to Plant Onion Seedlings
Onions are a cold hardy crop, so they can be planted much earlier than your warm season crops. Here in the PNW, I like to get mine planted in early April.
Make sure that your soil is workable and not too wet by doing the squeeze test. Grab a bit of soil in your hand and squeeze. If the soil stays in a muddy ball when poked, then the soil is too wet. If it crumbles and falls apart when poked, you are good to go.
Planting seedlings in soil that is too wet, will cause them to rot. When determining where to plant your onions, choose a sunny location with loose, with well draining soil. Remove any weeds from the area prior to planting.
Please don't use commercial weed killer, you really don't want that stuff anywhere near you or your food!
Seed Starting 101: How to Plant Onion Seed Indoors In Winter
How to Harvest and Cure Onions
How to Store Onions From the Garden for Use Through the Winter
Our favorite homesteading and gardening tools in our Amazon Store!
Our Garden Harvest Tally Spreadsheet is now available!
Fertilizing the Onion Seedlings
If you are new to gardening or starting a new garden, it is probably a good idea to test your soil to see where it is lacking in nutrients. I follow a no till method in my garden, so all supplements and organic matter are just added in layers above the soil.
Onions are heavy feeders, so first I add a good sprinkling of organic vegetable fertilizer. I try to choose one with a higher phosphorus level, as onions are a root crop, and phosphorus aids in root formation.
This year I used Jobes Organic Vegetable & Tomato Fertilizer which is rated 2-5-3. The first number is nitrogen, the second is phosphorus and the third is potassium. This is what I mean by choosing a fertilizer that is higher in phosphorus, see how the phosphorus number is the larger number of the three?
Than I add a couple inches of home made organic compost and water this all in a few days prior to planting.
Preparing the Seedlings
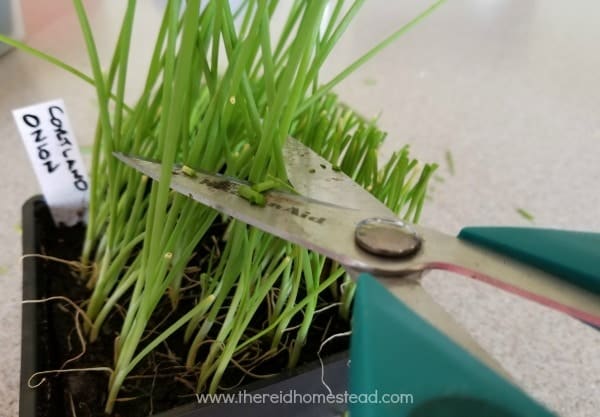
Trimming the onion seedlings, keeps them nice and tidy and allows for a healthier plant. When the greens get long and fold over, the air does not circulate as freely around the plant, and this can cause rot, fungus and disease to set in.
Prior to planting the seedlings, they need some preparation too. First, they should be big enough. Too small, and they may succomb to the elements and not make it.
I like the seedlings to be at least ⅛" in diameter. This means they are hardy enough to go outdoors.
Second, I trim them down if they are long by giving them a haircut, reducing them to only 3-4" tall. Once the seed germinates, and gets 5" tall, this may have to be repeated every few days, as they grow fast!
Save these trimmings, and use them as you would chives, or add to salads or stir fry with other veggies. Or dehydrate and save for later use. Don't toss them!
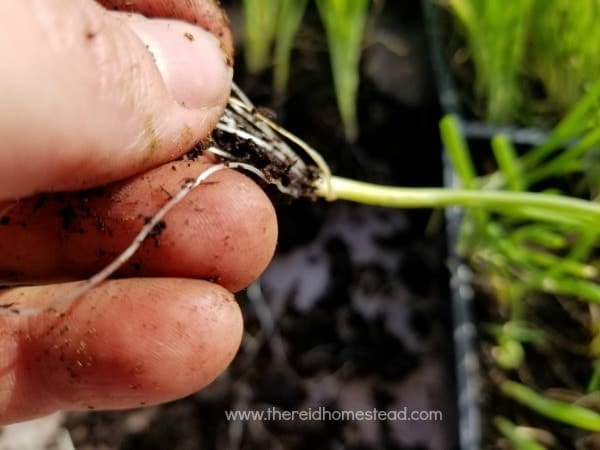
Then, right before planting, as I go along, I also trim the roots a bit, by pinching off the long scraggly roots, keeping them maybe ¾" -1" long.
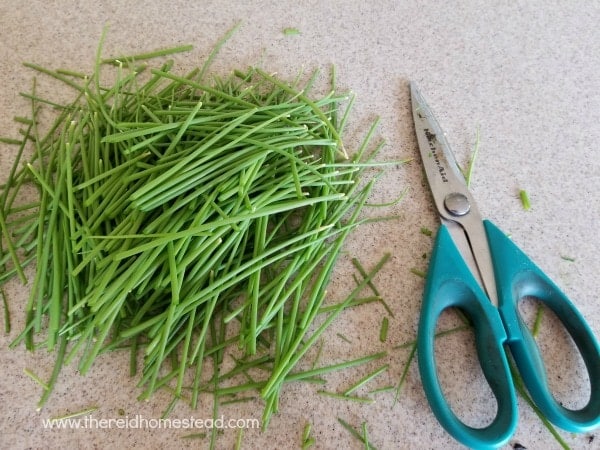
These are the onion seedling trimmings, which you get plenty of when growing onions by seed. Don't throw them away! Use them as you would chives or chop up and dehydrate for later use.
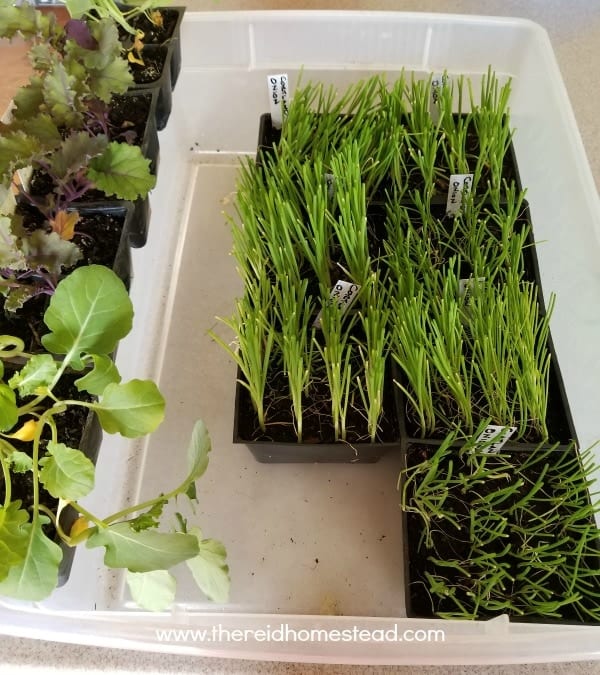
These are the onion seedlings I will be planting for this article, that filled the row shown at the bottom of the article.
How to Plant Onion Seedlings
When everything is ready for planting, take a chopstick or pencil, and poke holes into the growing bed. I use a metal chopstick, poke it into the soil about half it's length. Then turn it around and around in about a 1" diameter.
I tend to do about 25-30 holes at a time, with each hole about 4-6" apart. Then take one seedling at a time, and poke it down into the hole. Don't pat them in, just poke the seedling in and move on to the next one.
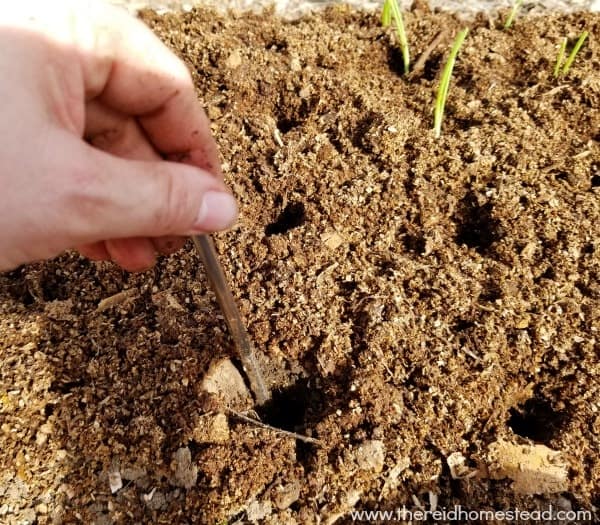
I take a pointed stick like a chopstick or pencil, and make the holes for the onion seedlings, by pushing down about half the length and turning in about a 1" diameter.
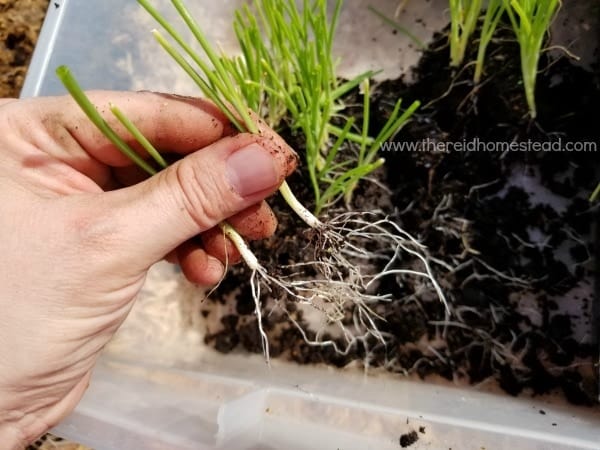
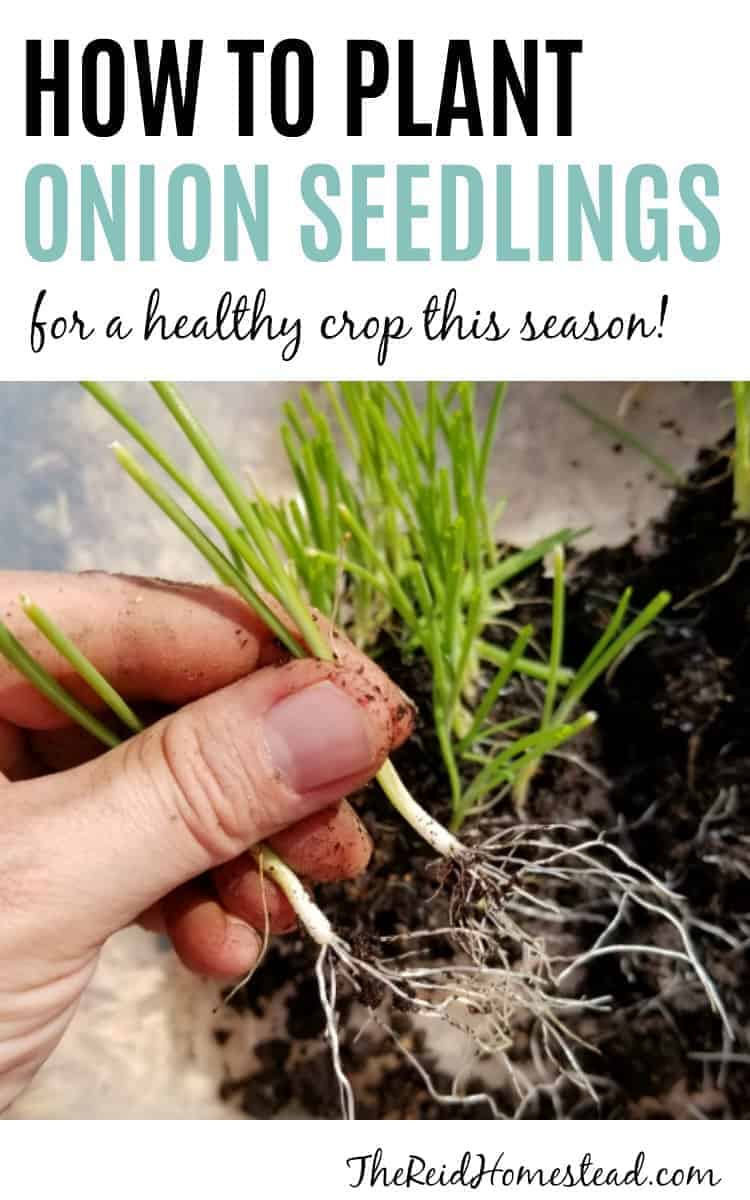
These are the onion seedlings after removing them from their growing tray, see how long the roots are? When poking them into the ground with roots this long, some of the roots will fold back up and not end up getting buried, which is why I pinch them off.
I literally pinch and tear off the longer roots on each onion seedling before planting.
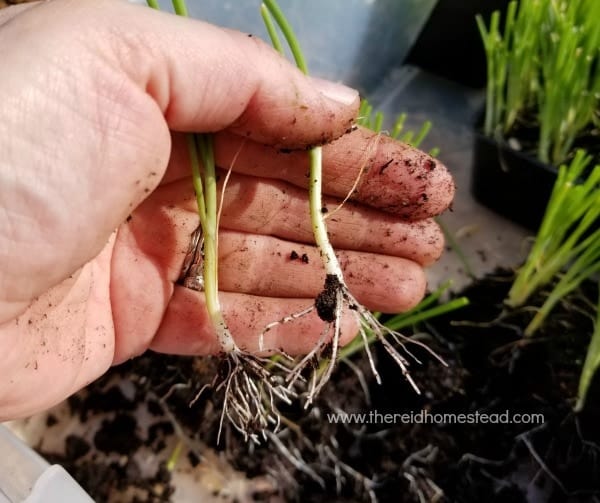
After pinching off the long roots of each seedling, you can see how the roots are all about ¾-1" long.
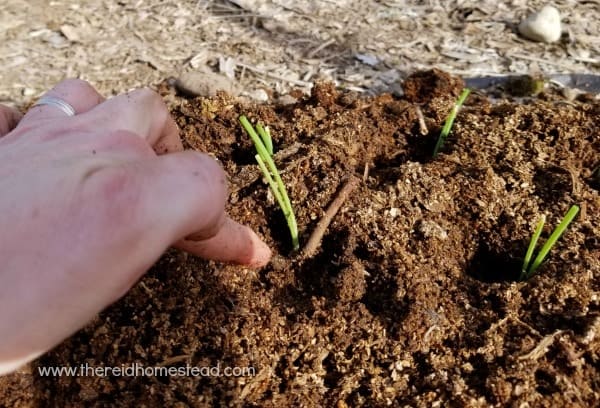
When planting, I poke each seedling down into each hole that I have made.
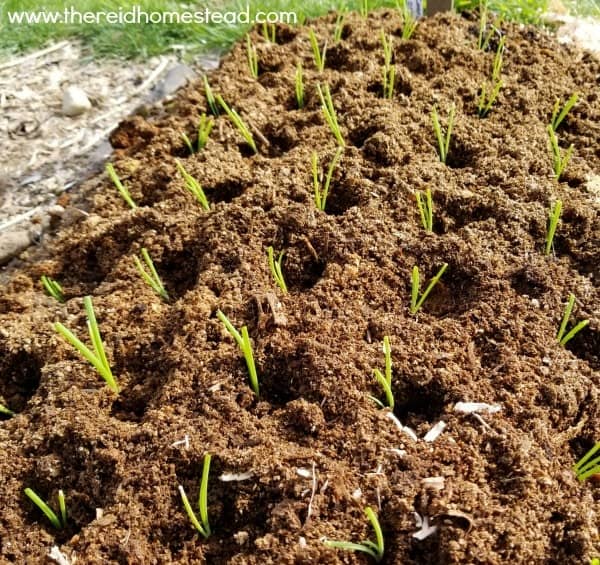
I plant the seedlings about 4-6" apart. You can always harvest green onions to thin them out if you plant closer together.
Care after Planting
After planting them, I take a hose and water them in gently with a gentle spray nozzle. This not only waters them, but allows some of the compost and soil to fall into the planting hole. Water them well this way.
After the seedlings have become established for about a month, you should mulch with another layer of compost and feed some organic fertilizer once a month for the first few months. Onions are heavy feeders, so providing the extra compost and fertilizer helps them grow large healthy bulbs.
They also like to be watered regularly, so don't neglect them during dry spells or consider using soaker hoses.
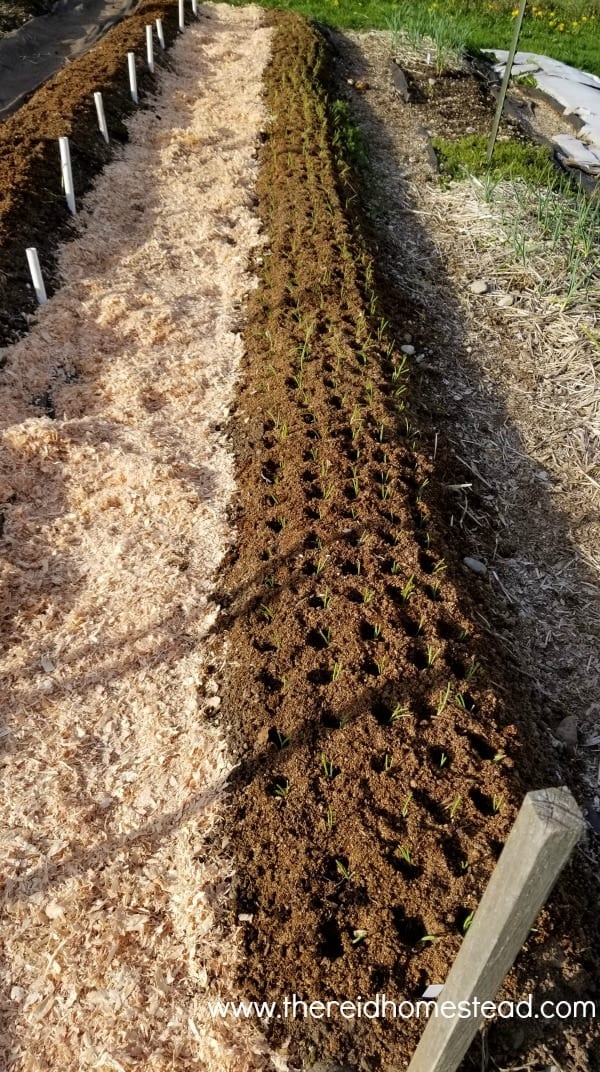
The finished row of planted onion seedlings, just waiting to be watered in.
Harvesting the Onions
You can harvest onions when they are young for green onions. To harvest when they are full size, wait until the bulbs are large in size, and the majority of the onion greens begin to flop over late in summer. When the greens have all begun to flop over, this is when it is time to harvest them.
Let the greens stay flopped over for about a week. Bend over any greens that have not flopped on their own. Then let them sit for about a week. This tells the plant to stop growing, and begins curing them.
After letting them rest for a week or so, gently lift them from the ground using a pitchfork, not by pulling the greens. Shake off the extra dirt and let dry in a warm dry area with good circulation for a couple of days until the roots shrivel, but not in direct sunlight.
I hope this article has successfully taught you how to plant onion seedlings. Please feel free to ask any questions in the comments! Happy Planting!
Want to Remember This For Later?
Please Pin "How to Plant Onion Seedlings" to your favorite gardening board on Pinterest for reference later!
RKSINGH
Nice and extremely informative write -up More details about manure, fertilization and irrigation may be helpful for bigner like me. Thanks a lot.
Tamara
Thanks Rksingh! I will try to get more content up on those topics! 🙂
Ken
Tamara,
I’ve been gardening for years and have received advice from several web sites. After reading through this posting, I am impressed with the pictures and advice you provided with this post. Rarely do I find a post with sufficient pictures to show what the writer is talking about. For that reason, I’ve signed up for your emails and hope your other post are as informative.
Tamara
Thanks Ken! Glad you found the article helpful! 🙂
Rede Batcheller
Excellent instructions! Especially about dealing with the over-erratic root hairs. Now, if it will jut stop raining quite as regularly or as much as it has been . . .
Shannon
We have a terrible time with squirrels dogging them up and eating the bulbs. Any suggestions on how to deter them?
Tamara
Hi Shannon, I haven't had the problem of squirrels eating my onions, but if I did, I might cover the whole garden bed with chicken wire or hardware cloth. It is also said that sprinkling the area with cayenne pepper can help deter them, but you would have to re apply it after it rains. Hope that helps!